

How To Fix Broken Band On Beats
If you want to know how to repair Beats headphones rapidly and without spending too much, this is the identify for you.
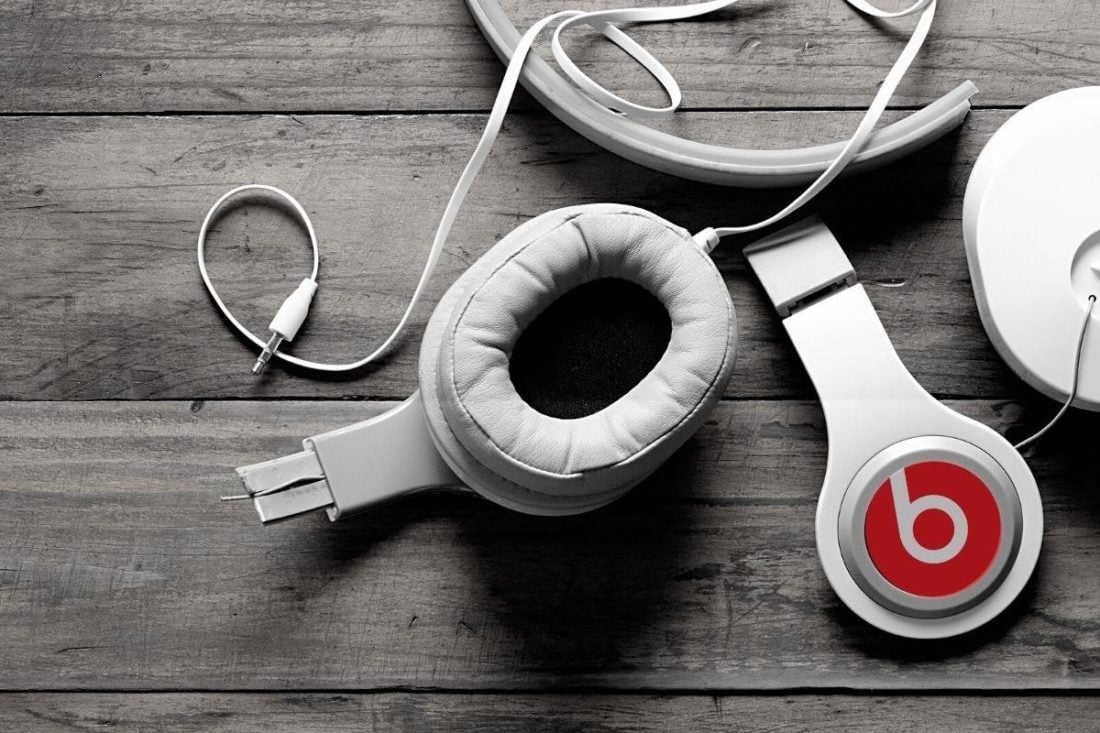
Beats is a well-known make for a reason. The brand's deep bass, remarkable style, and celebrity endorsements helped Beats become 1 of the top options for consumer-grade headphones.
Nonetheless, they aren't indestructible. Just like any headphones, they can break if dropped, stepped on, or squashed. Unfortunately, accidents tin happen even with the most careful owners.
Worse, finding assist can be hard, especially since Apple support can take up to 10 days and require you to spend more. Considering how loftier these headphones are priced, who would want that, right?
Residuum easy, though, because you've arrived at the right folio. If y'all're faced with the dilemma of broken Beats, here'due south a definite DIY repair guide for any hardware bug.
Repairing Beats Headphones: Should You DIY?
While the thought of repairing your own physically damaged Beats headphones may be exciting, you must be willing to take the risks it entails.
Beats headphones don't exactly come cheap. And, repairing the headphones yourself, instead of relying on professionals, can practice more than harm than good.
So, before you get straight to repairing your beats, consider the following pros and cons:
What We Like
- No lengthy repair waits.
- Cheaper.
- Self-satisfaction.
- Do it all at home!
- Some DIY repairs are authorized.
What We Don't Like
- Can be time consuming.
- Might need to buy specialty tools.
- Tin possibly damage your headphones.
- Unauthorized repairs risk voiding your warranty.
Sending your Beats to a technician who knows how to repair Beats headphones can take weeks. Merely, at least you're certain that your treasured Beats are in good hands, and information technology won't void any occurring warranties.
But non everyone has the time (and coin) to spend on those repairs. Not to mention, physical labor with your hands is found to reduce rates of depression. And so information technology could be tempting to try it yourself.
In fact, even Apple encourages DIY repairs. Depending on the situation and your warranty coverage, yous can be entitled to Apple's DIY parts service. Here, Apple volition send you lot the needed headphone parts to repair your Beats in commutation for the defective ones.
Not all concrete amercement are covered by this DIY parts service, though. That's why it'due south always advisable to check your warranty coverage earlier doing any DIY repairs.
Don't take the decision to void the terms of your warranty lightly. Make sure to check your coverage and utilize them every bit much as possible. Retrieve: Once your warranty is voided, in that location's no going dorsum.
How to Repair Beats Headband
The headband is the backbone of your headphones. But they're also one of the nigh fragile parts, especially if your Beats headphones get dropped or smashed in your bag. This is considering Beats' headbands are usually made from plastic to keep the overall headphones' weight lighter, instead of more durable materials like steel.
Here is how to repair your Beats headphones' headbands:
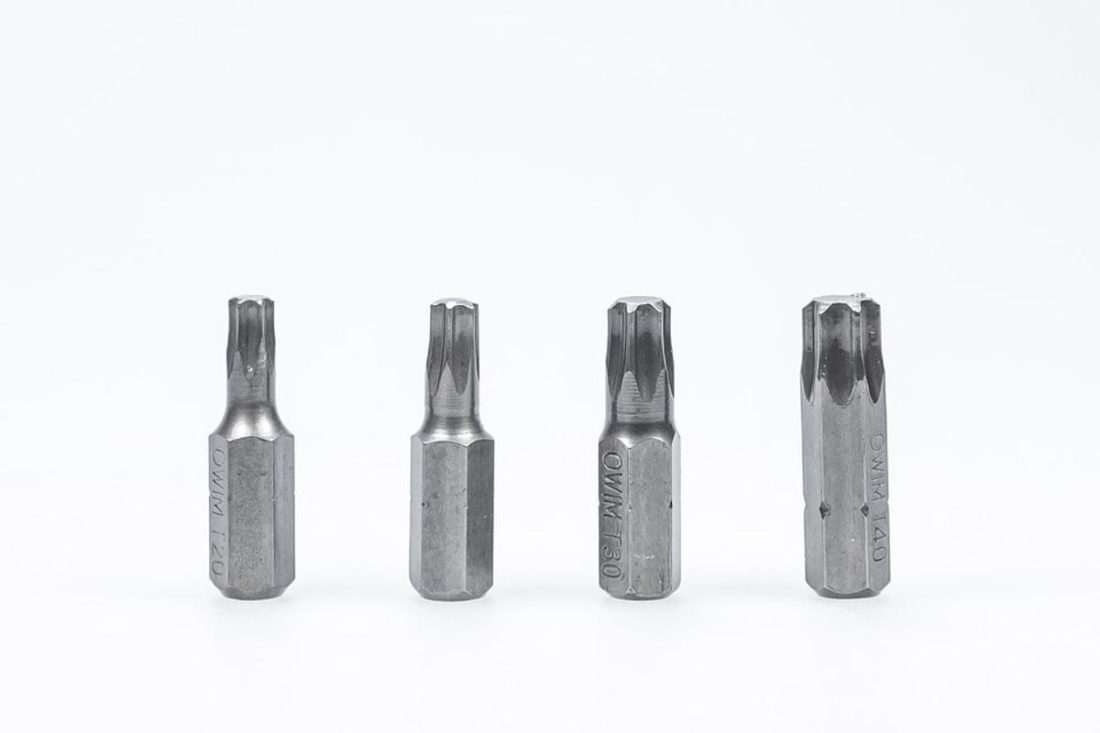
This repair will require a special type of screwdriver – a torx. The head of these screwdrivers look like a six-pointed star.
Tools you'll demand:
- Torx screwdriver
- Needle-nose pliers
- Replacement headband
- Unplug the headphones from any audio jacks or chargers.
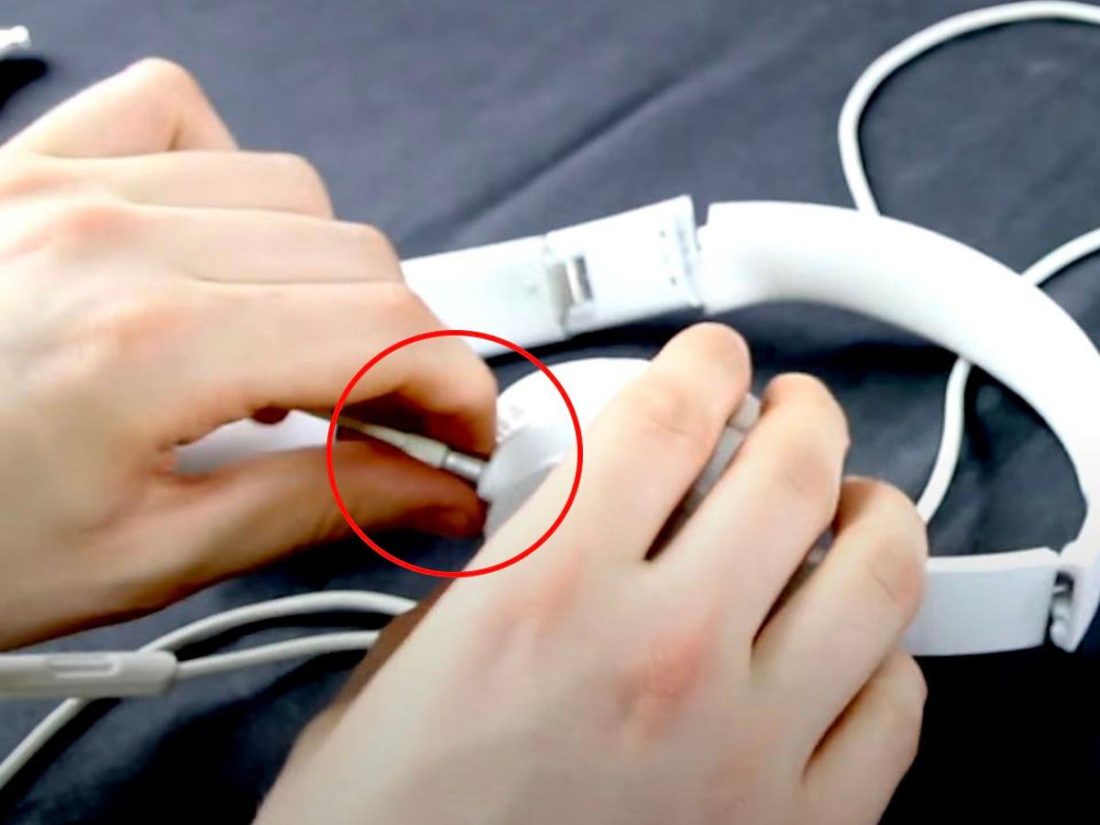
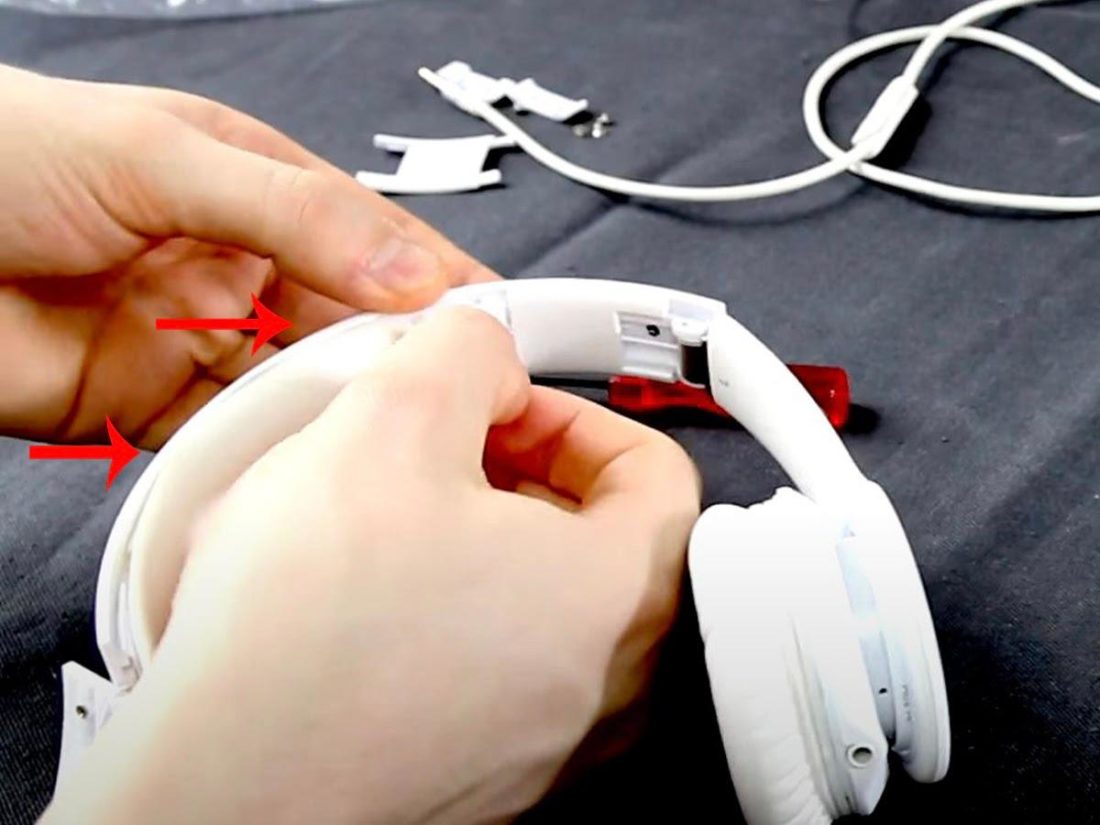
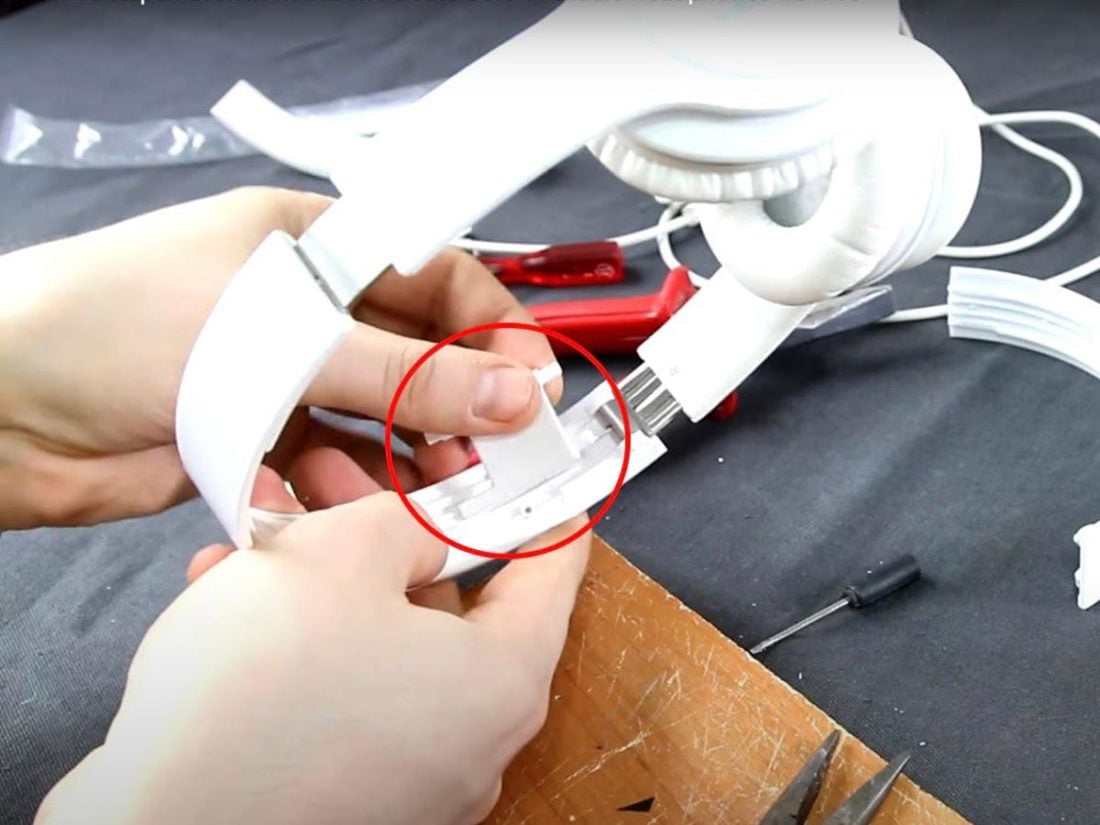
Unplugging headphones (From: Youtube/TechScrew) - Using the torx screwdriver, remove the iv screws on the sides of the headband. Then, detach the small plastic function the screws were holding in.
Remove the four screws on the sides of the headband (From: Youtube/Techscrew) - Pull off the headband cushion and H-shaped hinge-protector.
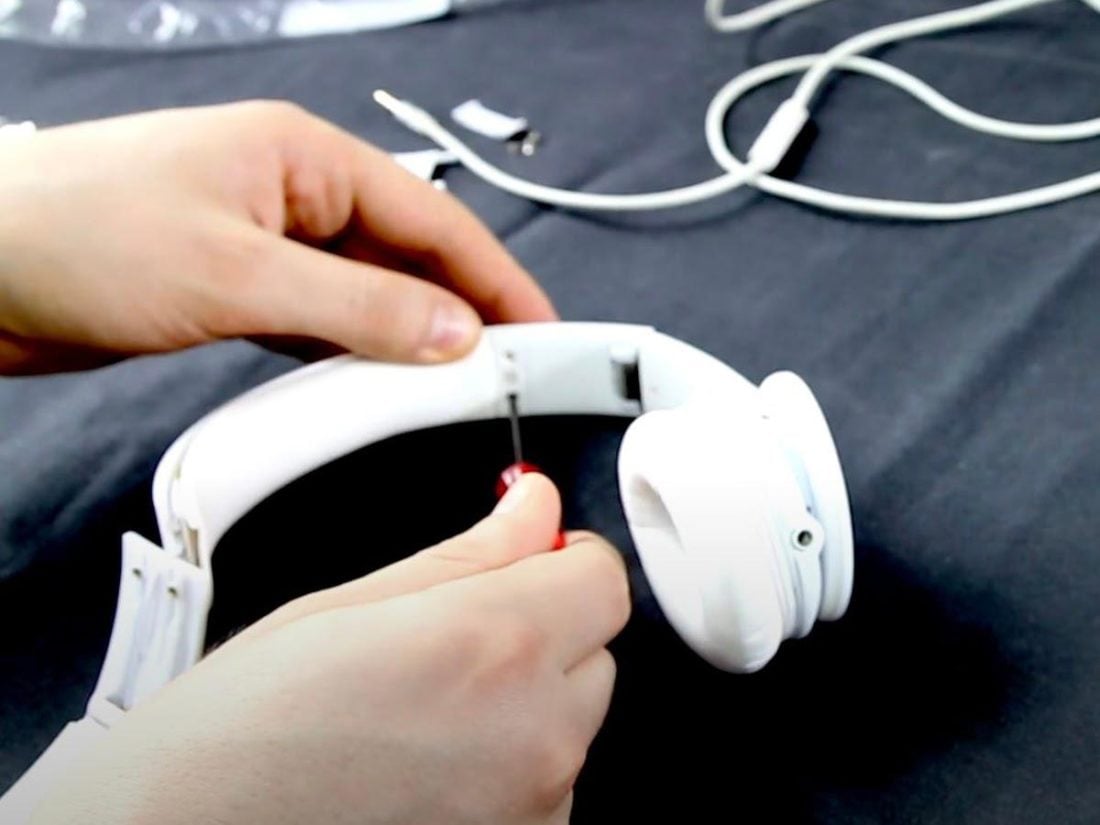
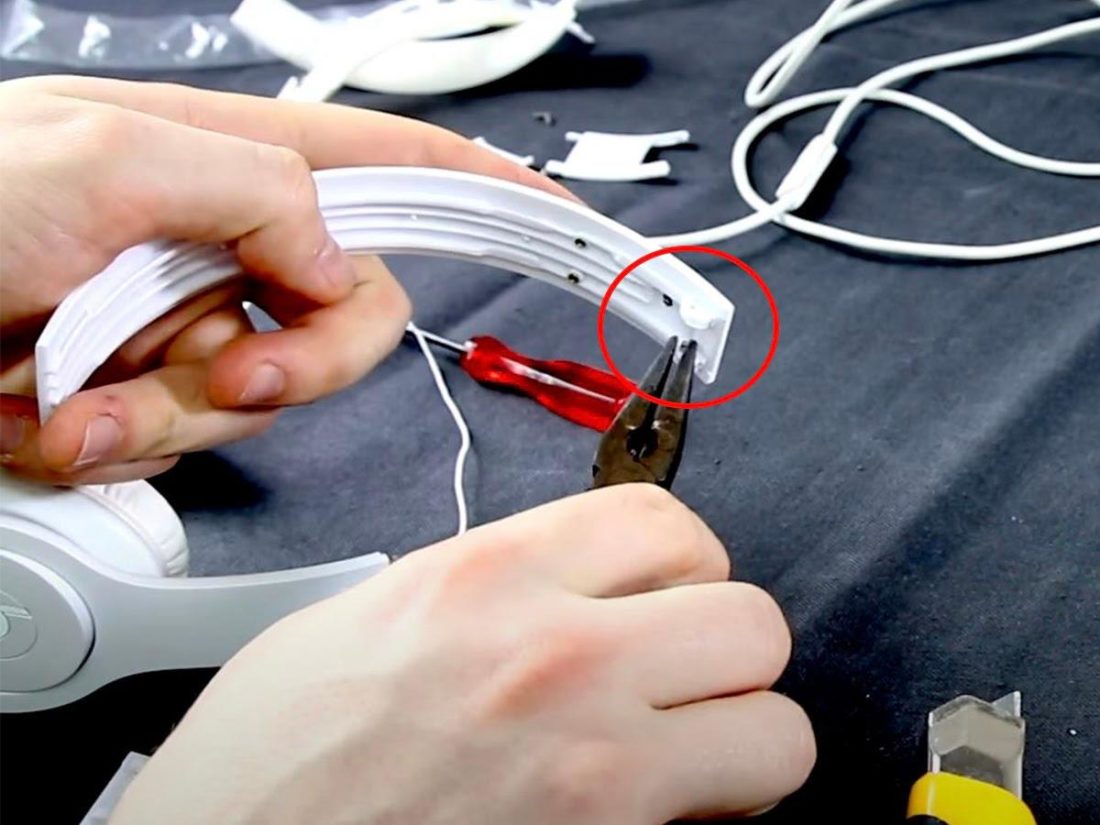
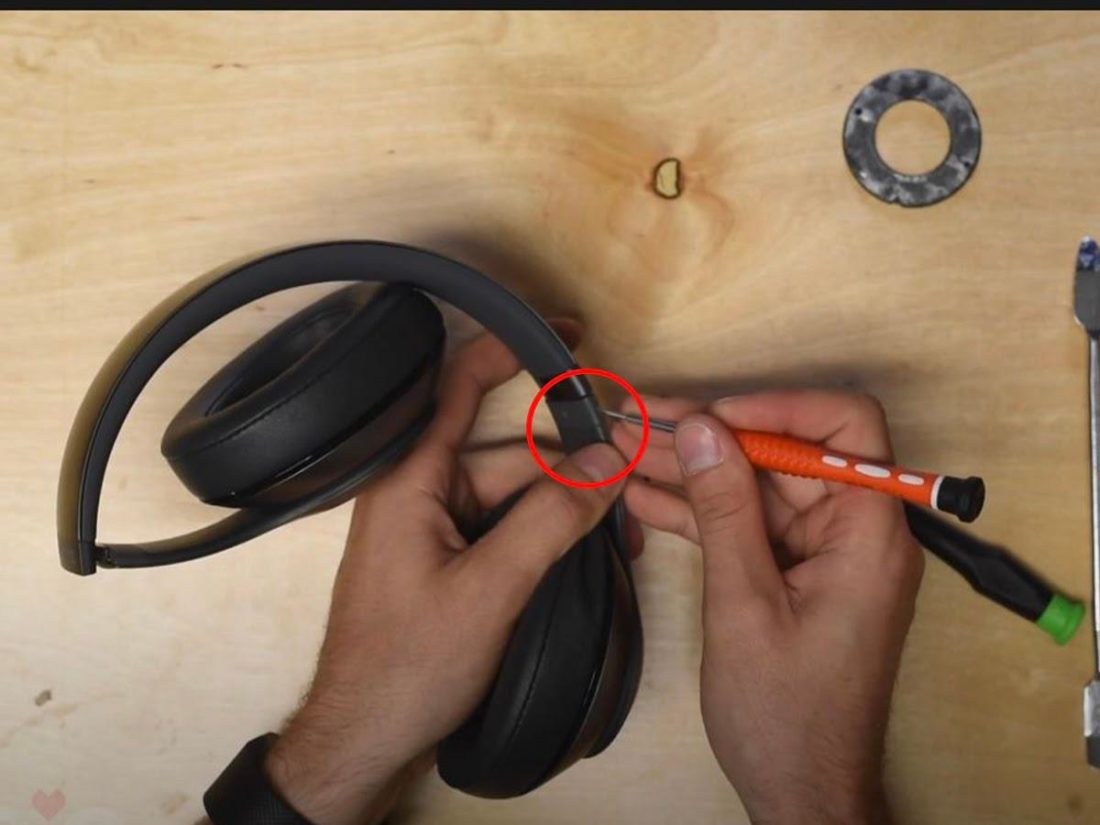
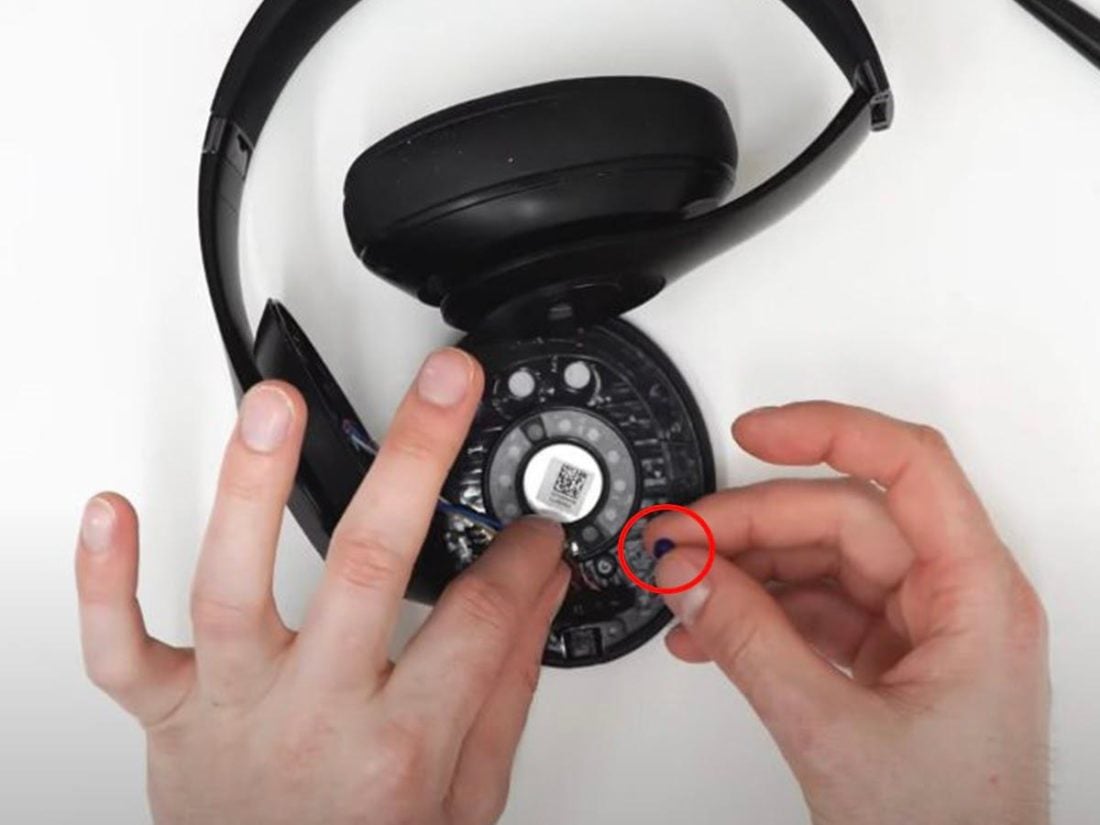
Remove the headband absorber (From: Youtube/Techscrew) - Advisedly snap off the old headband and remove the hinge pins with your needle nose pliers. Be conscientious not to harm the wire the connects the earcups.
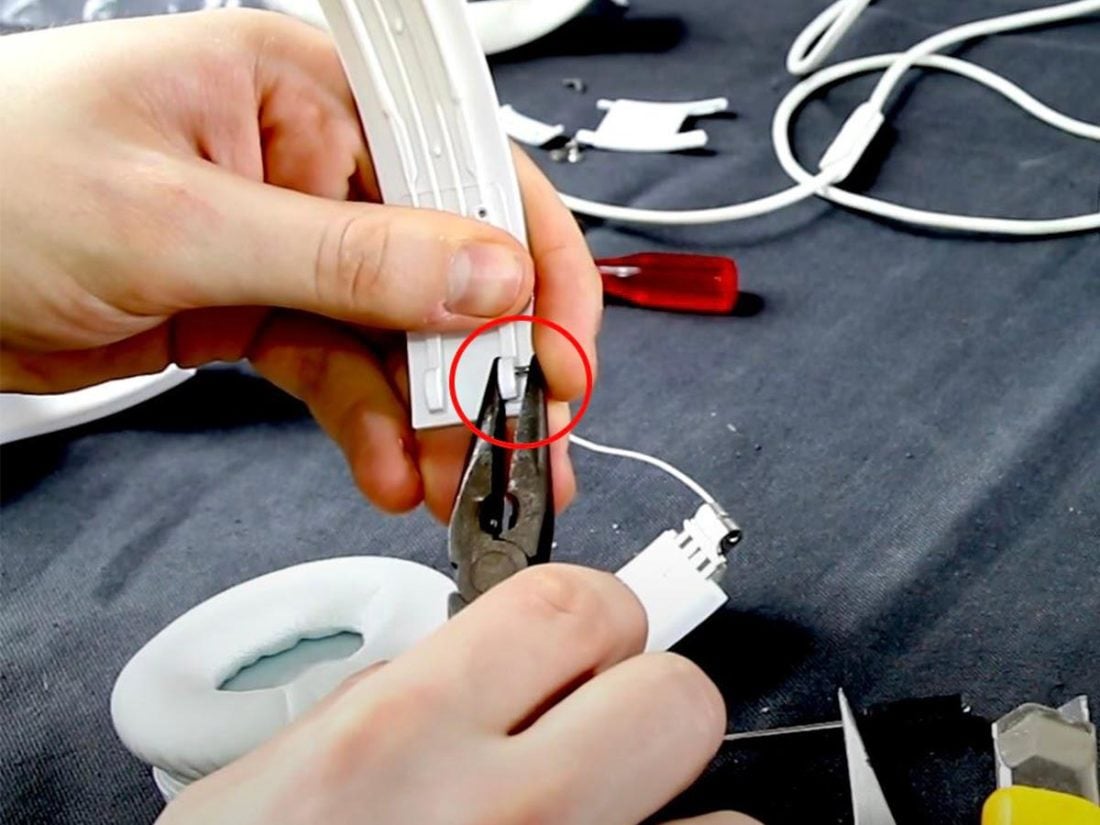
Remove the four swivel pins using needle-nosed pliers. (From: Youtube/Techscrew) - Put the new headband piece and reinsert the hinge pins.
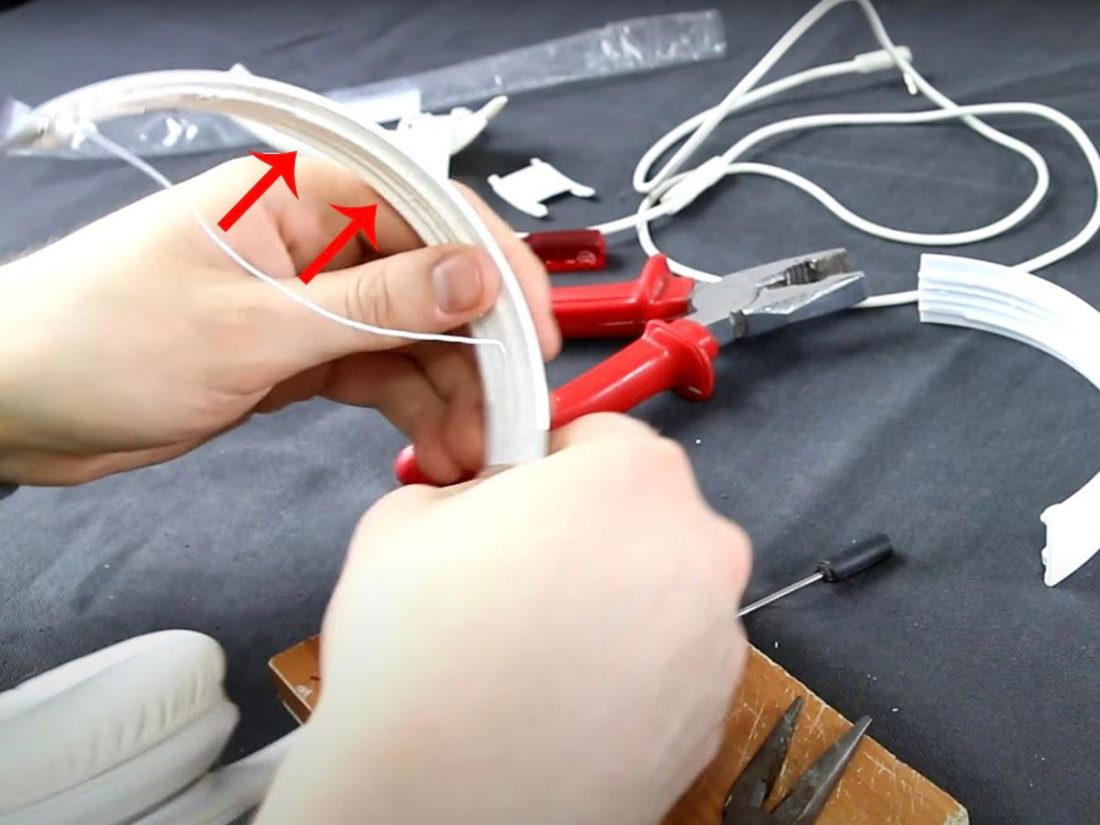
Reinserting hinge pins to new headband (From: Youtube/Techscrew) - Insert the wire that connects the headphone cups through the groove in the top.
Insert the wire into the groove at the top. (From: Youtube/Techscrew) - Replace the hinge protectors and cushion. Then, replace the modest headband slice with the Beats logo and y'all're all done!
Replace hinge protectors and cushion on Beats headband (From: Youtube/Techscrew)
Cheque out the demonstration video for more insights!
How to Change Beats Headphones' Batteries
Even when you're careful and follow all rules, Beats batteries, like all rechargeables, will eventually clothing out. They either won't charge anymore, or run out of power besides quickly. Without getting too complex, this ordinarily results from cathode decay in the battery.
Rechargeable battery decay isn't preventable, but you can prolong their life. Tips include always charging at room temperature and having a charging schedule.
Each step in how to repair Beats headphones' batteries will depend on the Beats headphones' model. For this, our detailed Beats bombardment-changing guide will help. But every bit a sample, follow along below for a brief guide on the Beats Studio 2:
Tools needed:
- Prying tool
- Small screwdriver
- New bombardment
- Use the prying tool to remove the outside middle cap on the right ear cup.
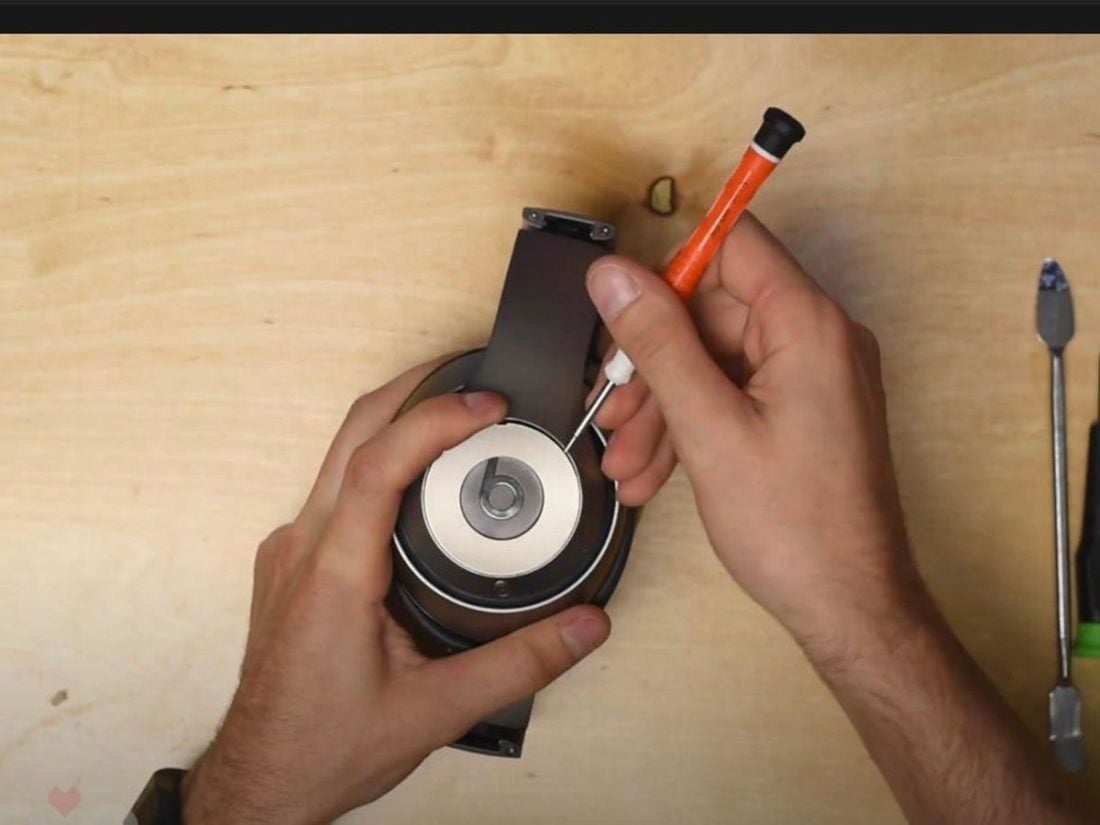
Pry open the outer cap. (From: Youtube/Joe'south Gaming & Electronics) - Unscrew the ear cup from the base.
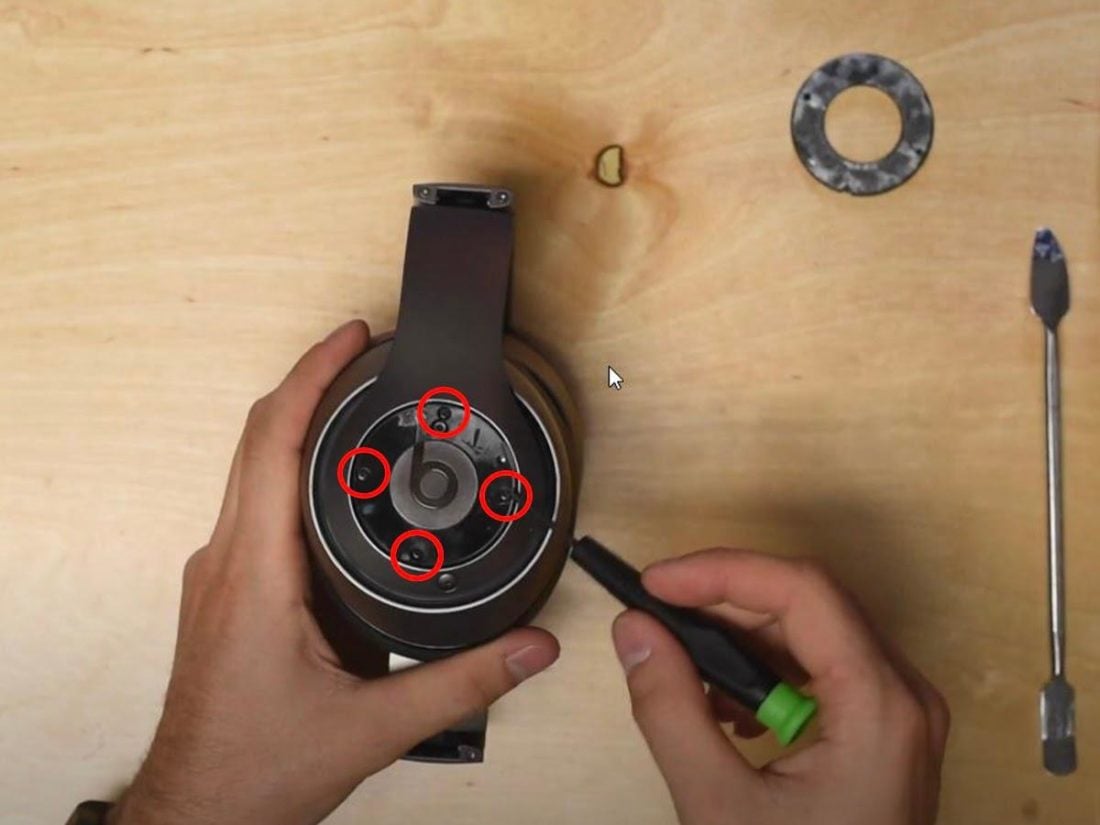
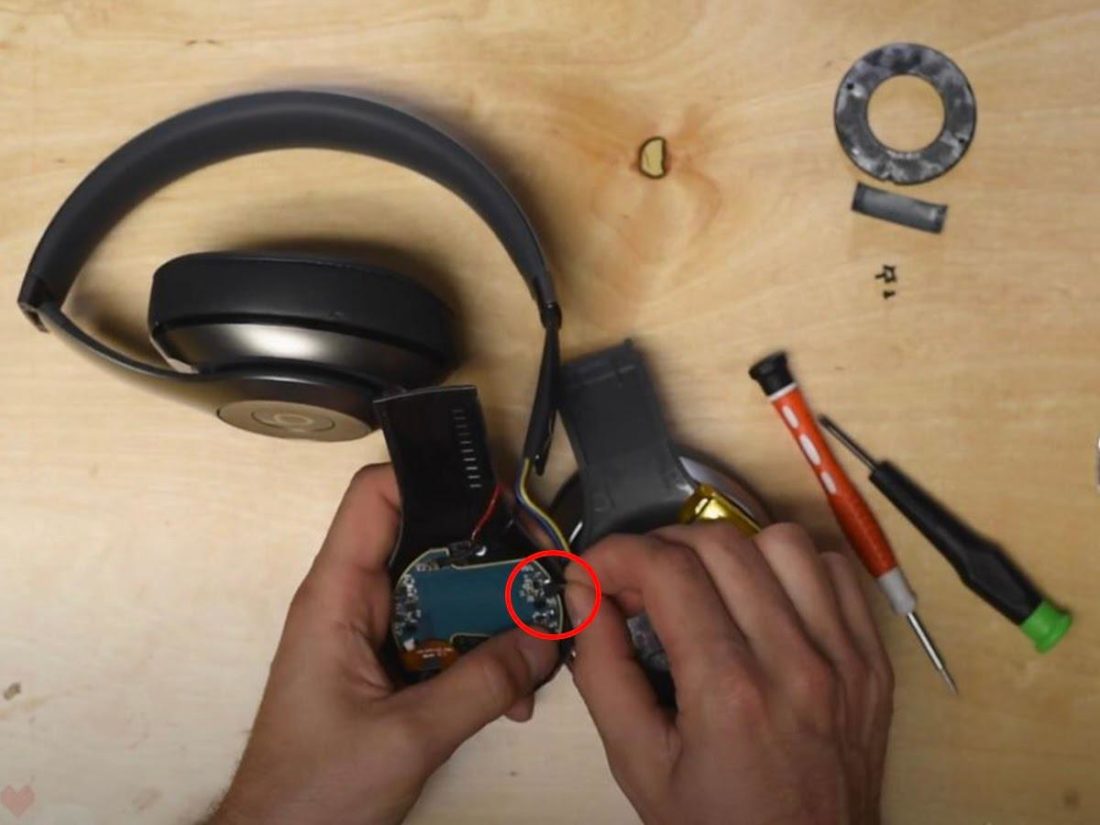
Unscrewing the ear loving cup to get to the speaker. (From: Youtube/Joe'south Gaming & Electronics) - Remove the "R" tab. Then, pull apart the plastic housing.
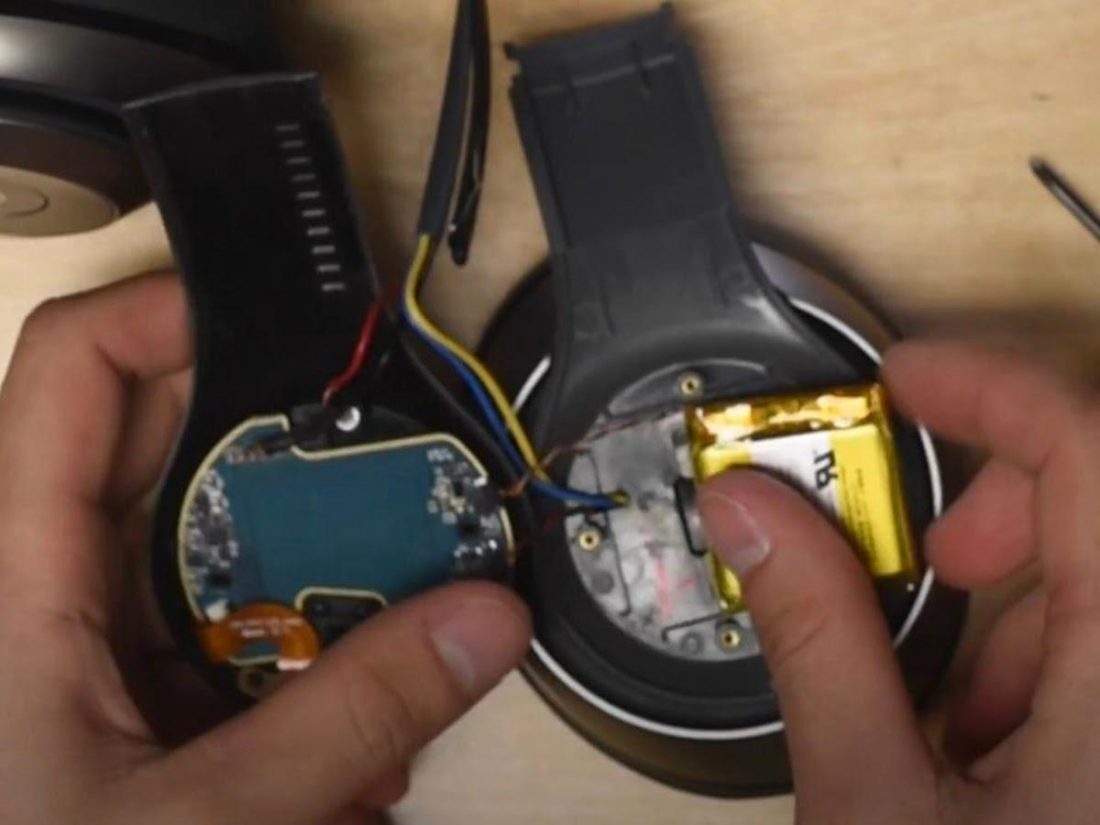
Removing the "R" tab. (From: Youtube/Joe's Gaming & Electronics) - Disconnect the bombardment cable from the mainboard.
Disconnecting the battery. (From: YouTube/Joe's Gaming & Electronics) - Employ the prying tool to remove the old battery.
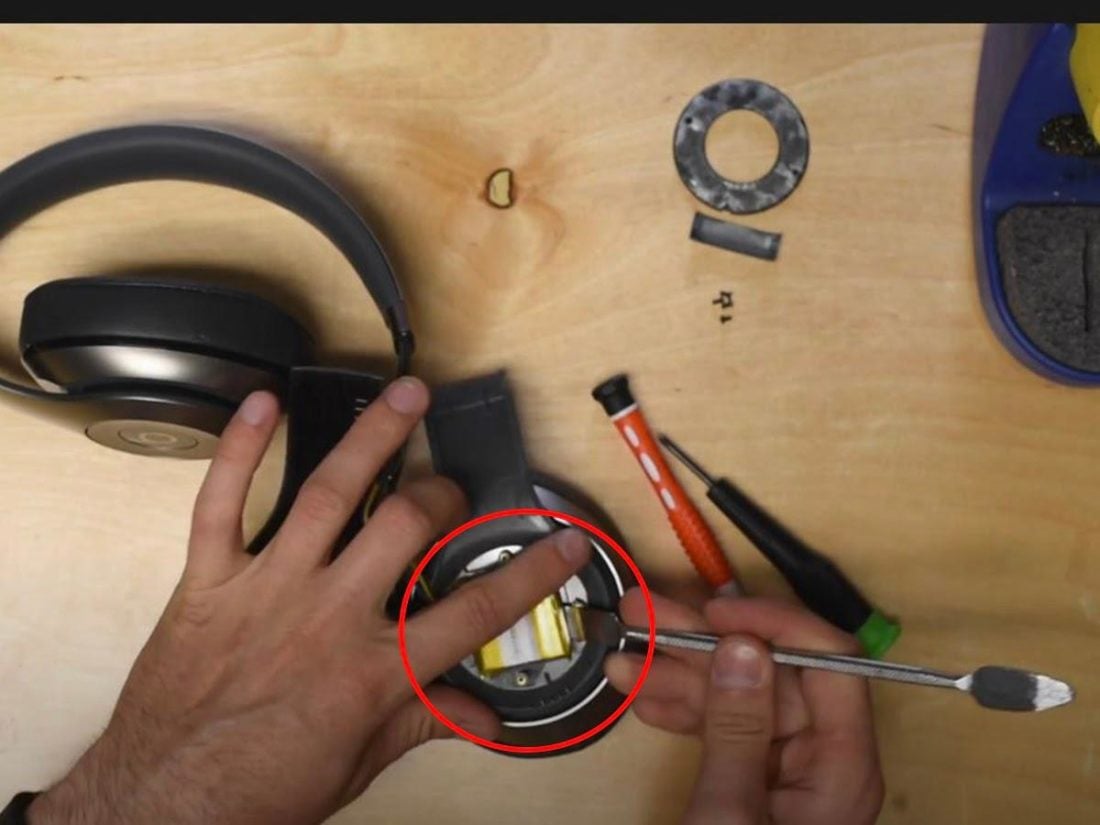
Pry up the old battery from the adhesive. (From: YouTube/Joe's Gaming & Electronics) - Replace it with the new battery.
Replacing Beats headphones bombardment (From: YouTube/Joe's Gaming & Electronics) - Reassemble the headphones in the opposite lodge that you took them apart.
Cheque out the video guide for more than details. Remember to check out our in-depth guide for other Beats styles.
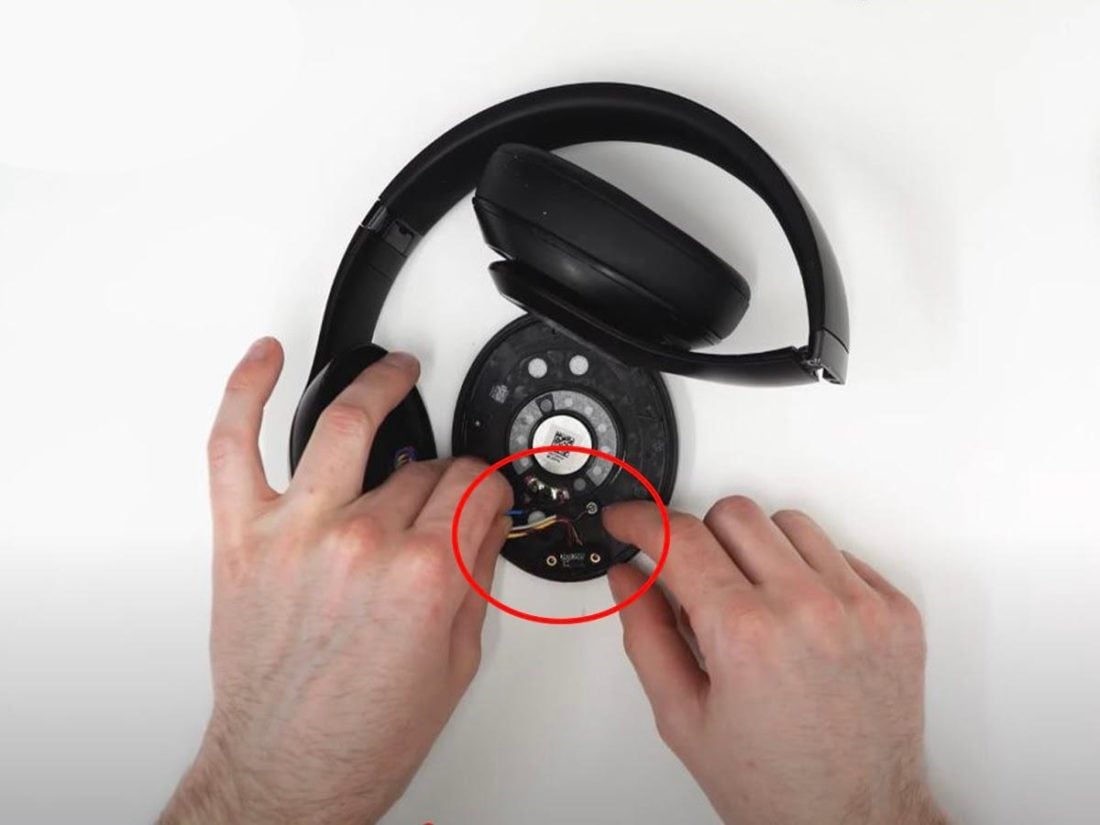
How to Repair Beats Headphones' Speakers
If the headband is the courage of your headphones, then the speakers are the soul. If this role has problems, you may be tempted to just throw your headphones out. Besides, they only won't audio as skillful as they should.
Just, like any other office, they are also replaceable.
Nevertheless, your Beats headphone speakers are usually surrounded by other electronics. That'south why knowing how to take apart your speakers without damaging them is critical.
Remember that opening your Beats headphones volition void the warranty. Before proceeding, make sure to cheque if your warranty is nonetheless valid and come across if you lot can utilize that instead.
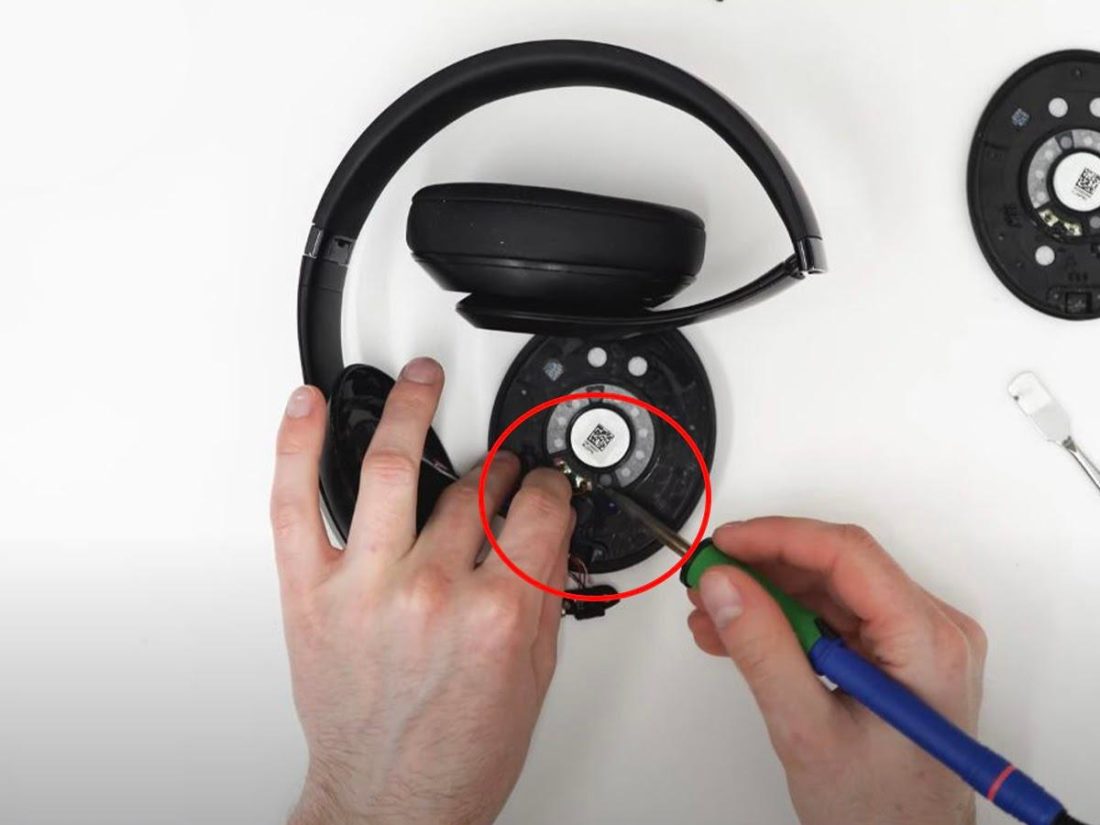
Tools needed:
- Prying tool
- Small screwdriver
- Soldering gun, solder, and flux.
- Remove the padding on the damaged side.

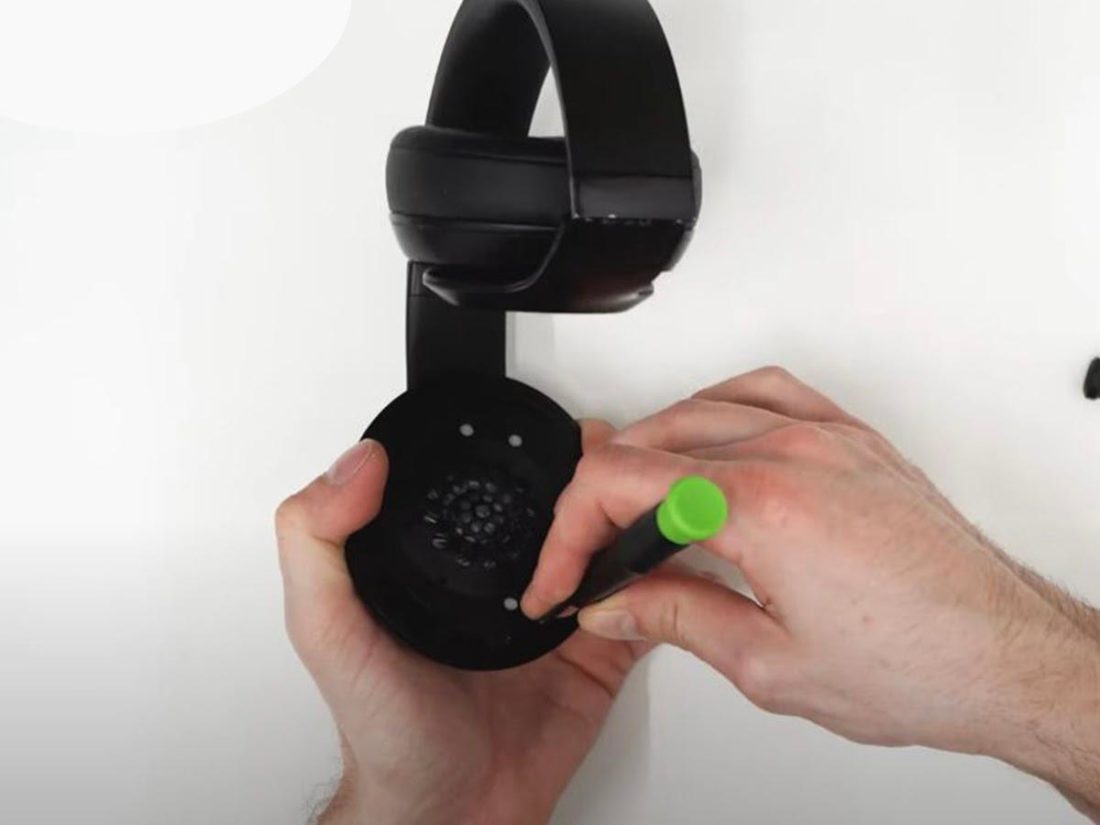
Removing Beats headphone padding (From: Youtube/Joe's Gaming & Electronics) - Unscrew the speaker housing.
Taking apart ear loving cup (From: Youtube/Joe'southward Gaming & Electronics) - Unsnap whatsoever wires in charge ports.
Have off the snap-on charge port. (From: Youtube/Joe's Gaming & Electronics) - Unsolder the speaker wires.
Removing speaker wires (From: Youtube/Joe's Gaming & Electronics) - Briefly heat the charger port to remove it. And then, remove the small rubber ring from the MS port.
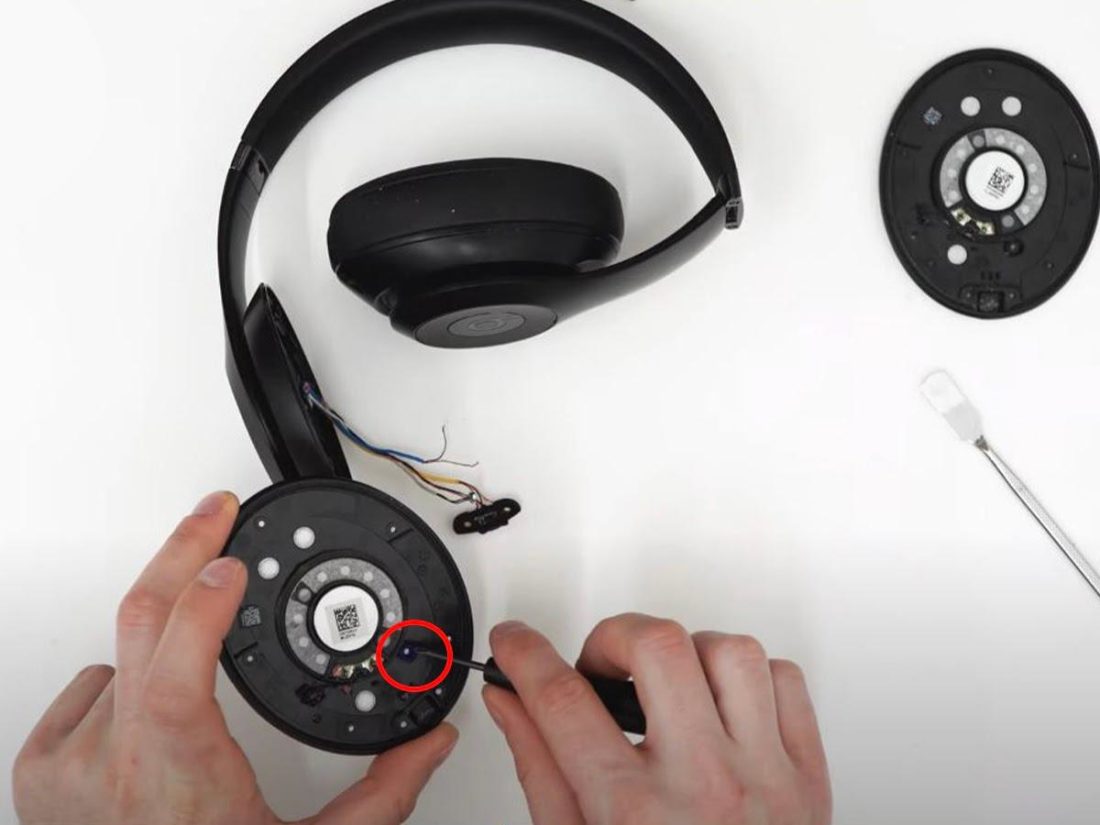
Remove the pocket-sized rubber ring from the speaker. (From: Youtube/Joe's Gaming & Electronics) - Solder on the new speaker's wires.
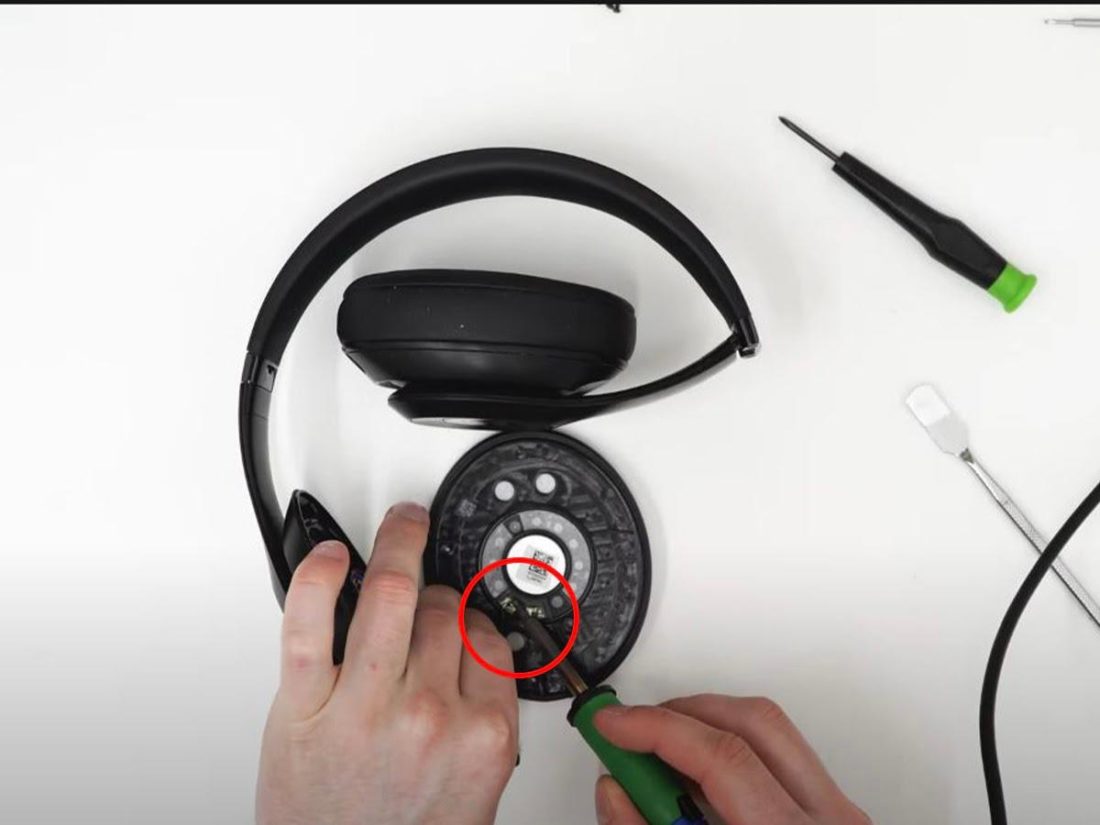
Placing the new Beats headphone speakers (From: Youtube/Joe's Gaming & Electronics) - Snap back the charger port in. This doesn't need to be glued down.

Putting back the charger port (From: Youtube/Joe's Gaming & Electronics) - Put the small safe band on MS port and snap information technology in.
Placing the rubber rings dorsum (From: Youtube/Joe'southward Gaming & Electronics) - Spiral the new speaker'southward housing on and place back the padding, and you lot're washed!
Screwing back the speaker housing (From: Youtube/Joe'southward Gaming & Electronics)
Call up that speakers have magnets. Don't put the small screws near the speakers or you will risk damaging them, or losing your screws.
For a video tutorial, this acoustic guide will besides walk you through every step of the process.
How to Repair Your Cleaved Beats Headphone Plugs
People accept been proverb the headphone jack will go extinct for years now. However, despite the infiltration of Bluetooth headphones, USB-C, and lightning ports, the 3.5mm standard prevails for so many uses. And with jacks and plugs come frayed wires.
Luckily, frayed wires can be fixed. In fact, our standard headphone wire repair guide will mostly embrace what you need to know.
Merely, for an in-depth guide for how to repair your Beats' jack, carry on:
This guide assumes you have in-depth soldering knowledge and skills. There is a wonderful soldering guide over at Techspray if you demand to castor up on your skills earlier you brainstorm!
Tools needed:
- Solder gun, solder, and flux
- Scissors
- A new AUX jack
- Tweezers
- Estrus Gun
- Blue Loctite
- 2P-10
- Oestrus shrink tube
- Cut off the damaged AUX cable, leaving as much wire remaining every bit possible.
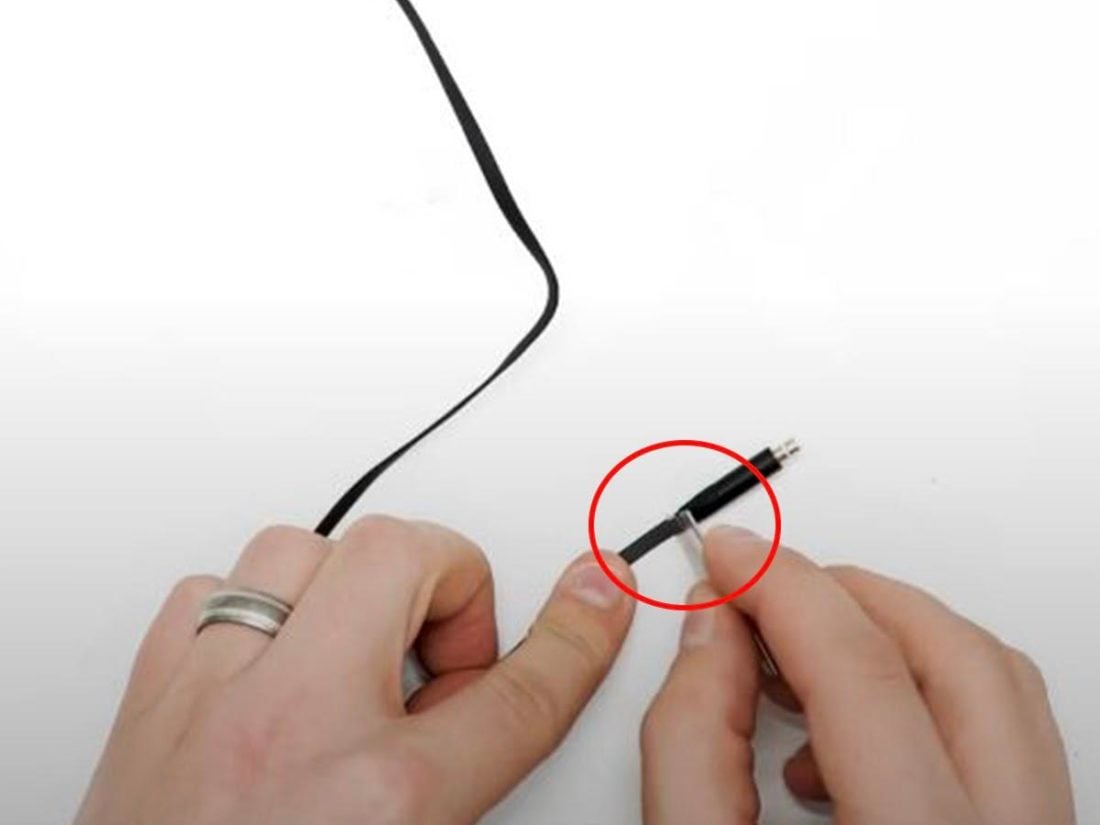
Cut the damaged AUX cable equally near to the base as possible. (From: Youtube/Joe'southward Gaming & Electronics) - Carefully remove the outer layer of the cord (most ¾'s of an inch should practise) to reveal the wires inside.
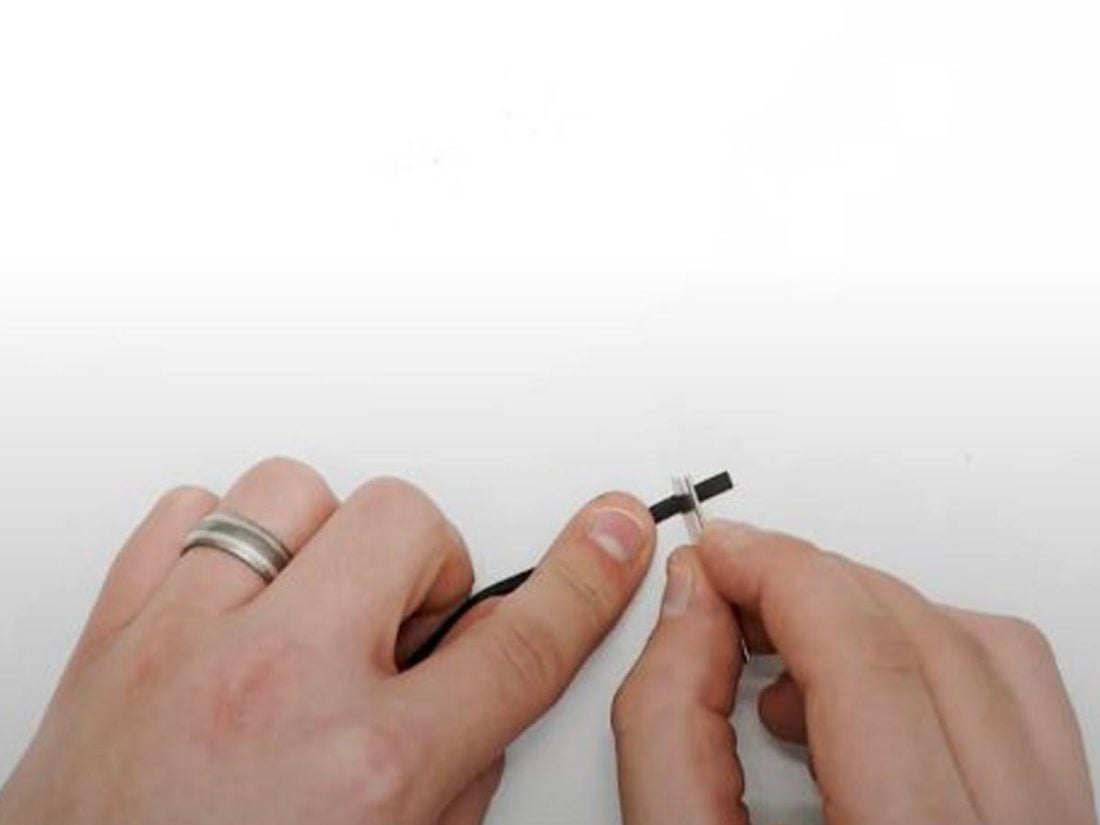
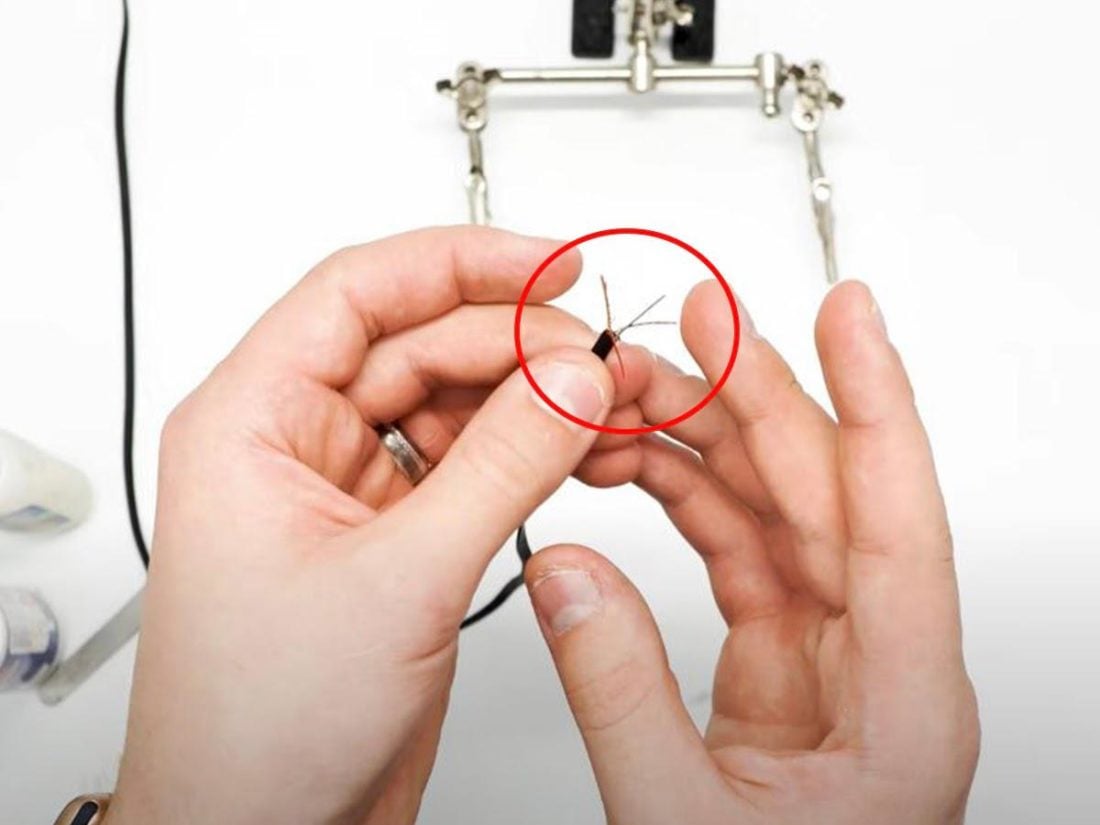
Remove outside layer of the cord (From: Youtube/Joe's Gaming & Electronics) - Separate out the gold, red, and greenish wires and twist them per colour. You can cutting downwards the insulation and extra wires to salvage room.
At this bespeak you should accept iv bundles of wires: Blood-red (left speaker), green (right speaker), ruby-red and green (mic), and gilded (grounding).
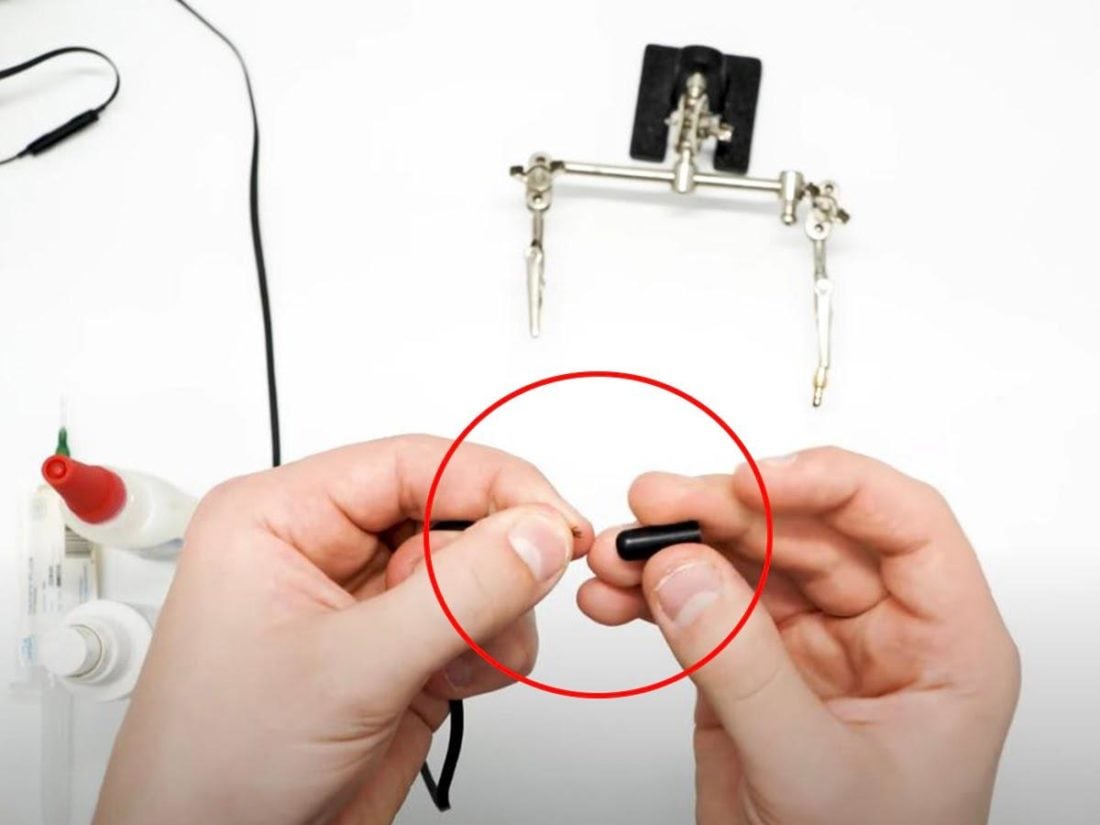
Segregate the wires (From: Youtube/Joe's Gaming & Electronics) - Slide the wires through the stop piece of the new headphone plug.
Put twisted wires inside the new plug (From: Youtube/Joe's Gaming & Electronics) - Cutting the clear shrink tube in half. Then, slide the cable through the shrink tube. It should rest on the end slice of the new AUX port.

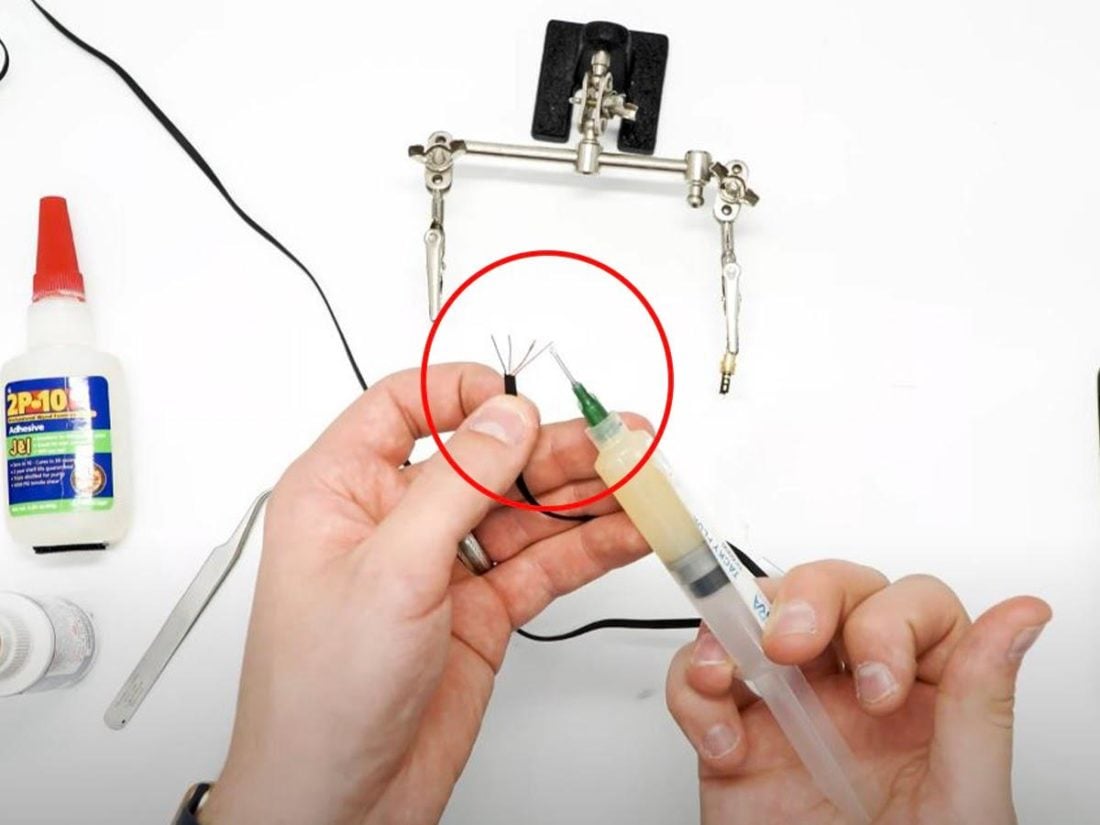
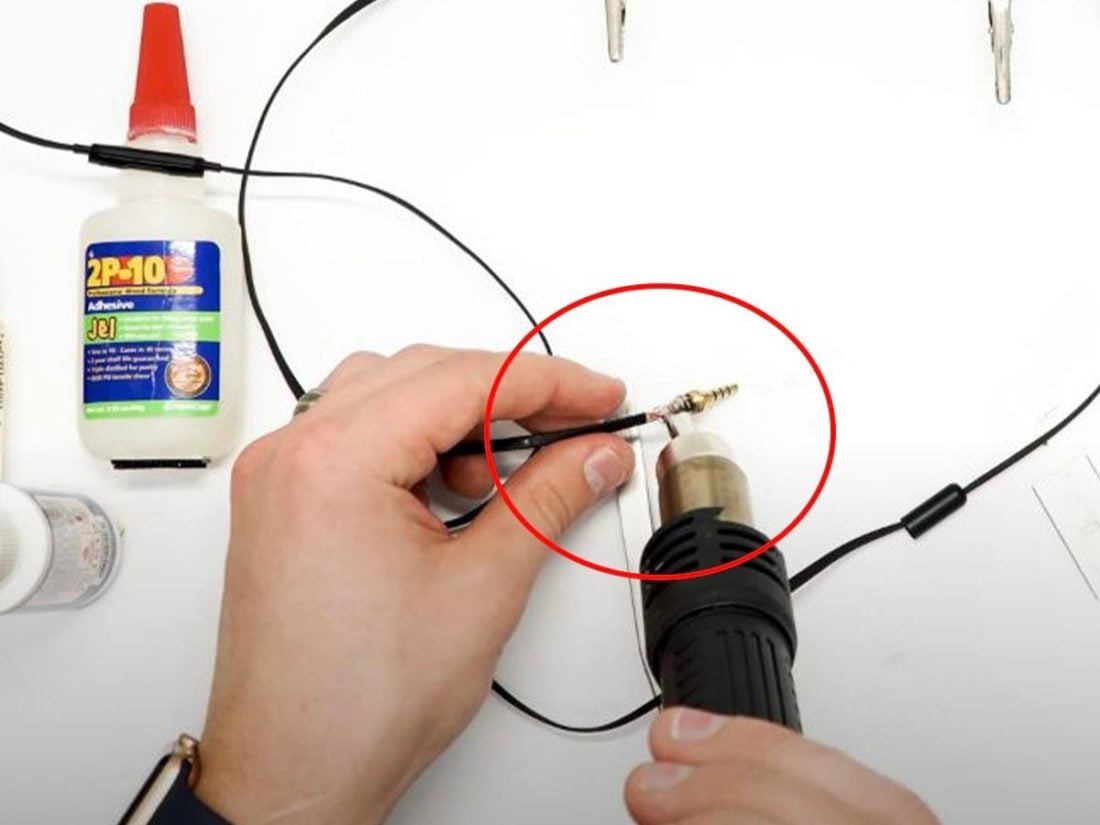
Cutting the estrus shrink tube (From: Youtube/Joe's Gaming & Electronics) - Put your flux on the ends of each wire bundle and solder each wire tip.
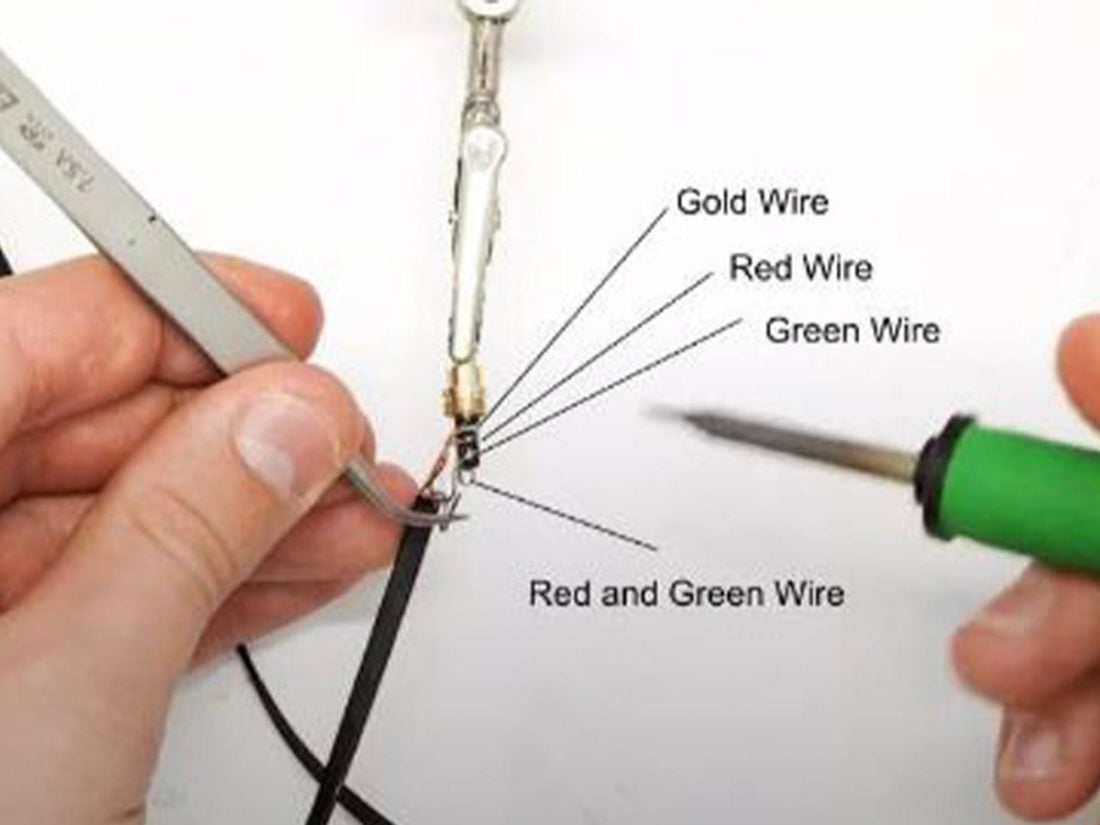
Applying flux at the end of each wire (From: Youtube/Joe's Gaming & Electronics) - Apply flux and solder onto each of the points of the wire-receiving end of the new AUX port. Make sure the points don't touch. Solder on the wires in the society listed in the diagram below:
Wire soldering guide (From: Youtube/Joe's Gaming & Electronics) - Examination your speakers (and mic) to make sure they work. One time that's okay, carefully slide apply oestrus with the heat gun or hair dryer to secure the heat shrink tube.
Securing the rut shrink tube (From: Youtube/Joe'southward Gaming & Electronics) - Slide the back up and seal with blueish loctite glue, twisting firmly into identify. Add together 2P-x on the cable side of the back, as shown beneath:
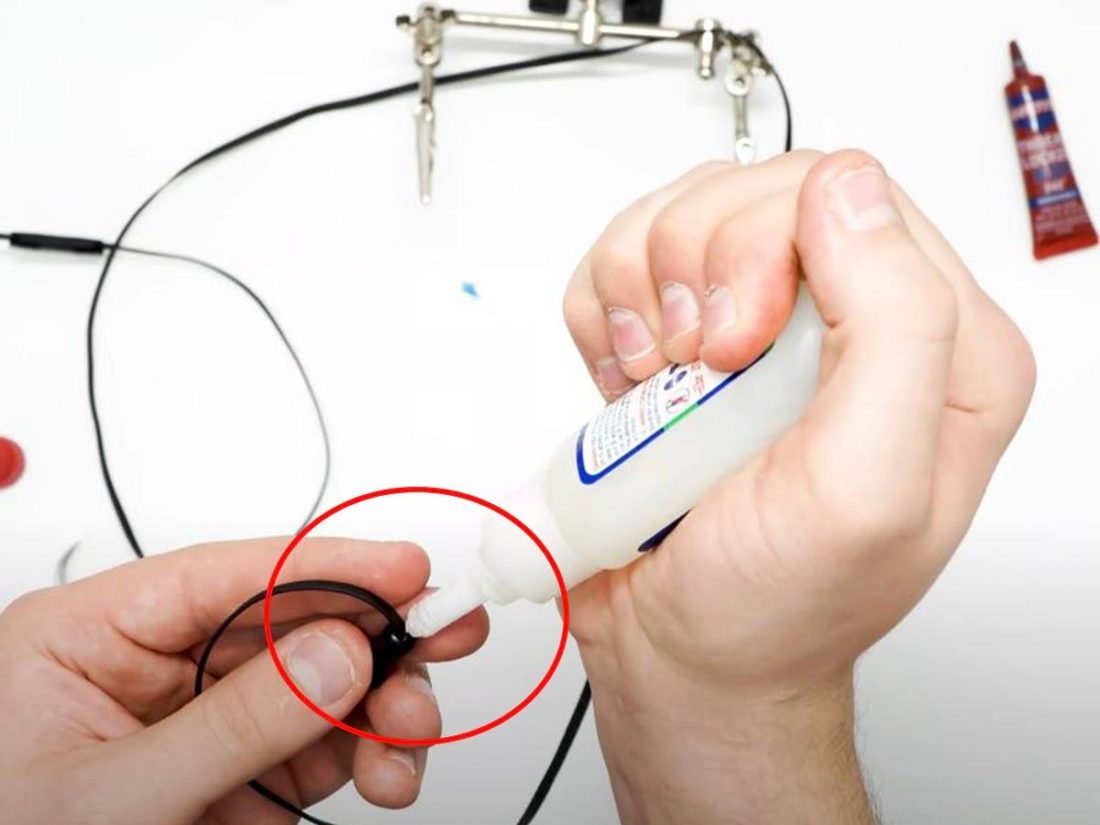
Adding the 2P-ten (From: Youtube/Joe's Gaming & Electronics) - Spray TP-10 activator on the region.
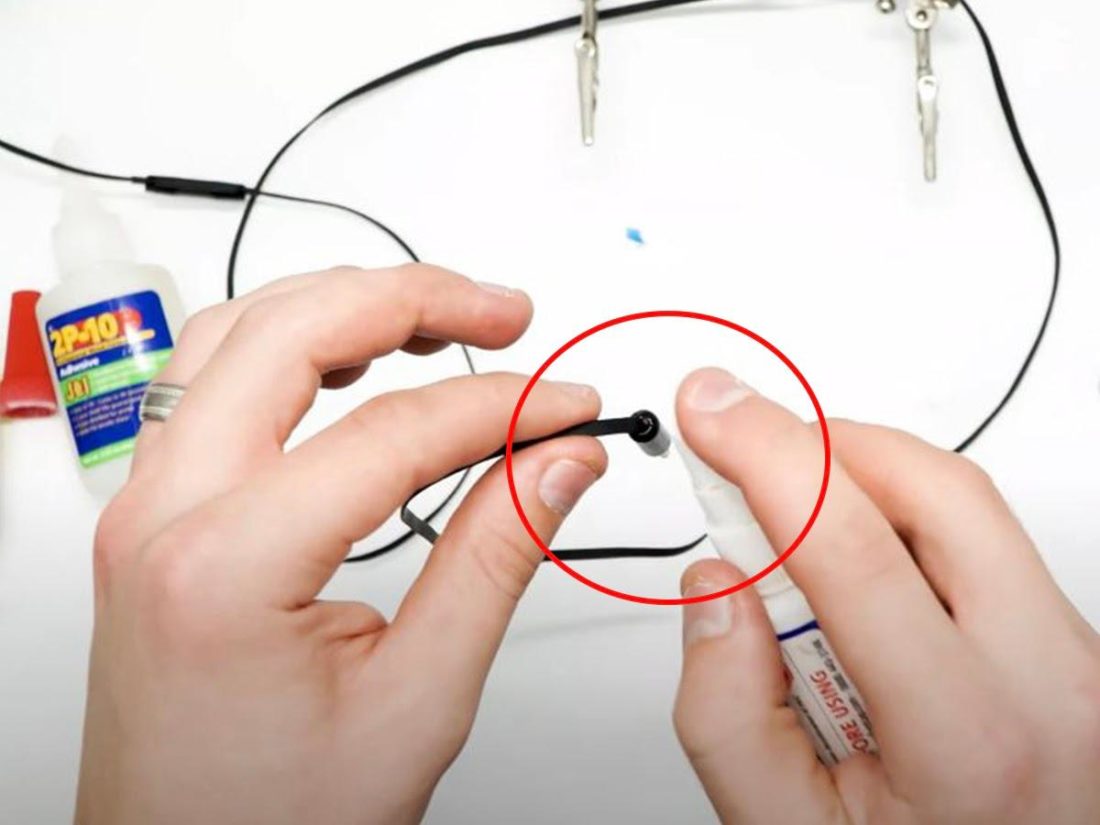
Spraying the TP-10 (From: Youtube/Joe'southward Gaming & Electronics) - Allow all chemicals dry before using the headphones.
This gear up could have a long time, from i to two hours depending on your soldering skill. Since this is a chip technical, y'all tin as well visit this video for a visual step-by-step guide. Once you've done information technology once or twice, it will become much easier.
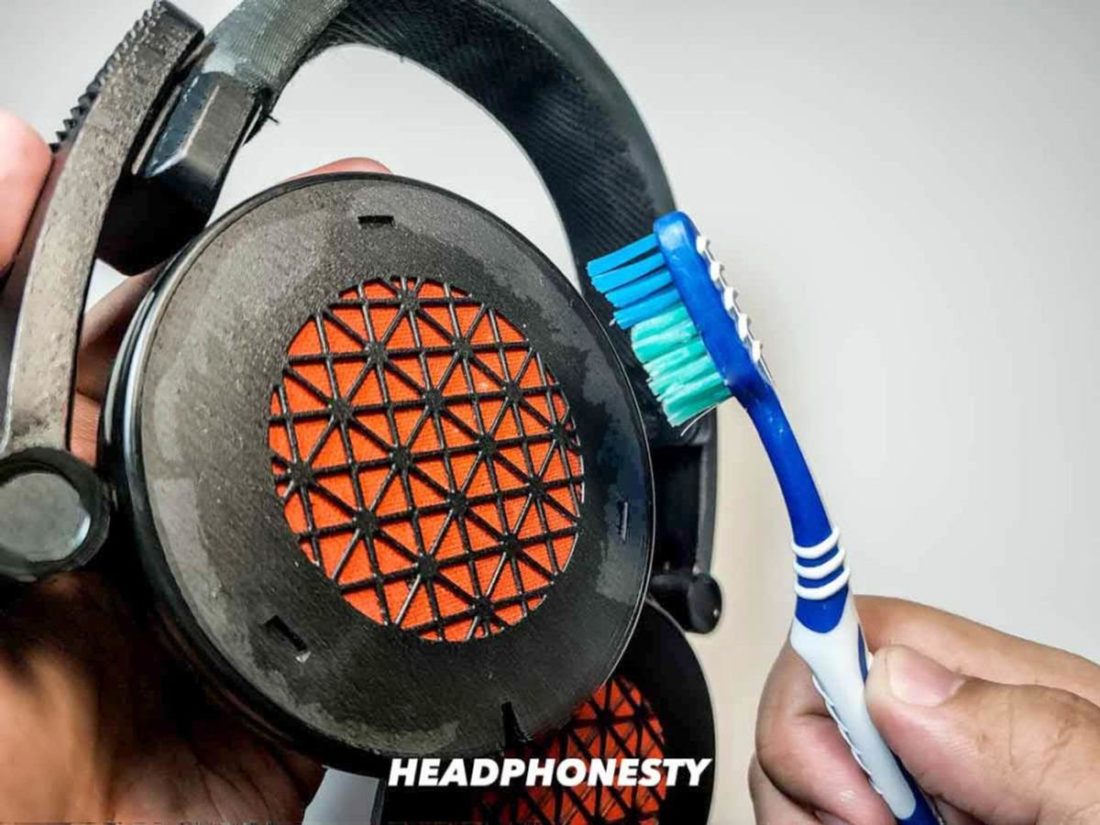
How to Supplant Your Beats Headphone Pads
As nice as Beats headphones are, the pads are prone to getting worn out, or worse, rotten.
Luckily, replacing Beats headphone pads is quite a bit easier than what we just did in the previous section. Please refer to our headphone pad replacement guide for actress tips.
Tools needed:
- Replacement pads
- Earpad tape
- Prying tool
- Old toothbrush
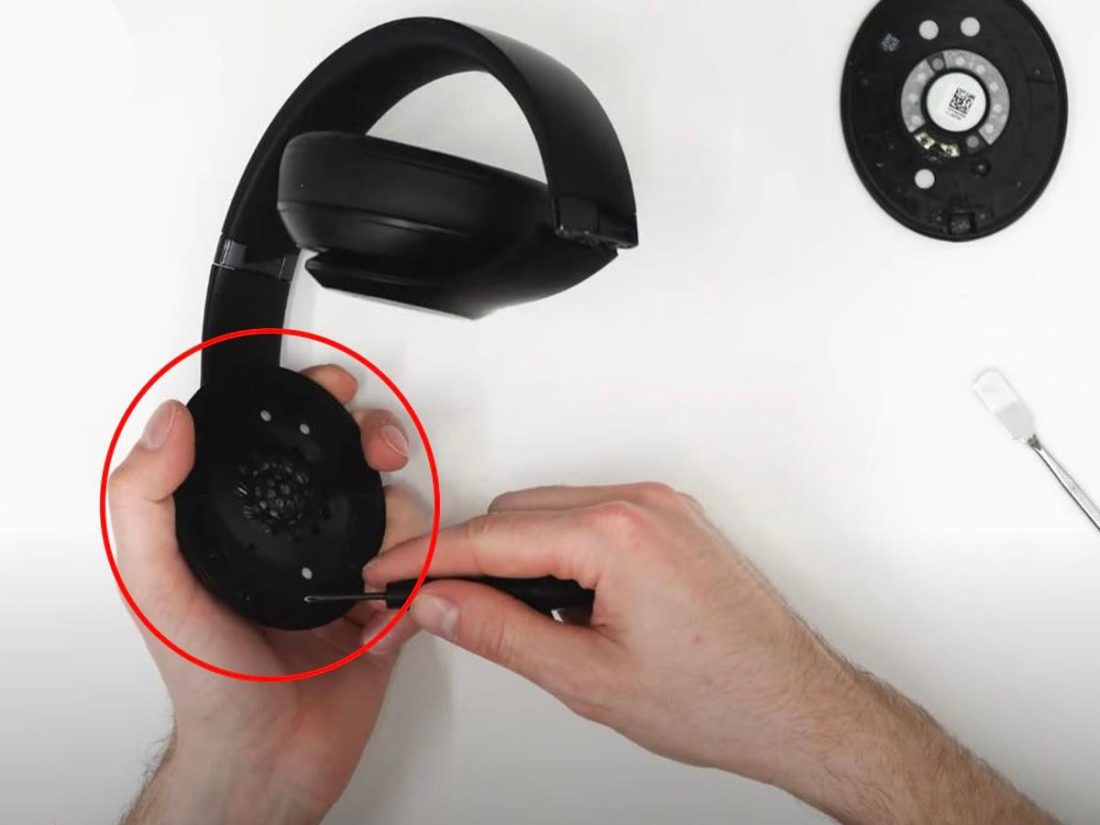
- Gently insert the prying tool in between the speaker housing and the ear pad of the pad to be replaced.
Insert your prying tool in the space between the pad and the base of the headset advisedly. - Offset prying abroad at ane section. Slowly work your fashion around the pad until it loosens enough to come up off.

- Apply the toothbrush to carefully scrub off whatever old dirt, glue, dust, etc. on the driver.
- Employ earpad tape to the replacement headphone pad. Brand sure the holes line up properly.
- After the tape is fit snugly to the pad, remove the tape cover.
- Carefully orient the earpad and attach it to the headset where the old one was removed. Make sure to printing and concord the earpad to the headset for a few seconds or until a secure bond is formed.
How to Repair Beats Headphones via Apple tree Back up
If doing the repairs yourself feels daunting after you've read the instructions to a higher place, you lot may want to merely consult Apple Support instead.
You may feel that if you are using Apple Back up, then yous're not going to accept to do a lot. While true, it is all-time to exist fully informed before spending your difficult-earned cash for repairs.
For that, here are some things you should know:
How to make a service request
Before making a service request, yous'll probable desire to know if your Beats authorize.
Older Beats are divided into 2 categories, "vintage" and "obsolete."
"Vintage" products are those that are at least 5 years one-time and less than 7 years old. There may be some limited help bachelor.
"Obsolete" products include all Monster-branded Beats and any Beats seven years onetime or older. No hardware service is available for 'Obsolete' Beats.
Even if your production is considered 'obsolete' in that location is however a risk Apple tree Support people might be in the know of some specialty fixes. If y'all take the fourth dimension, there'south no shame in giving them a phone call.
In one case yous've decided your products tin can still be serviced, follow the instructions below:
- Go to https://getsupport.apple.com/
- Select 'Service Asking'
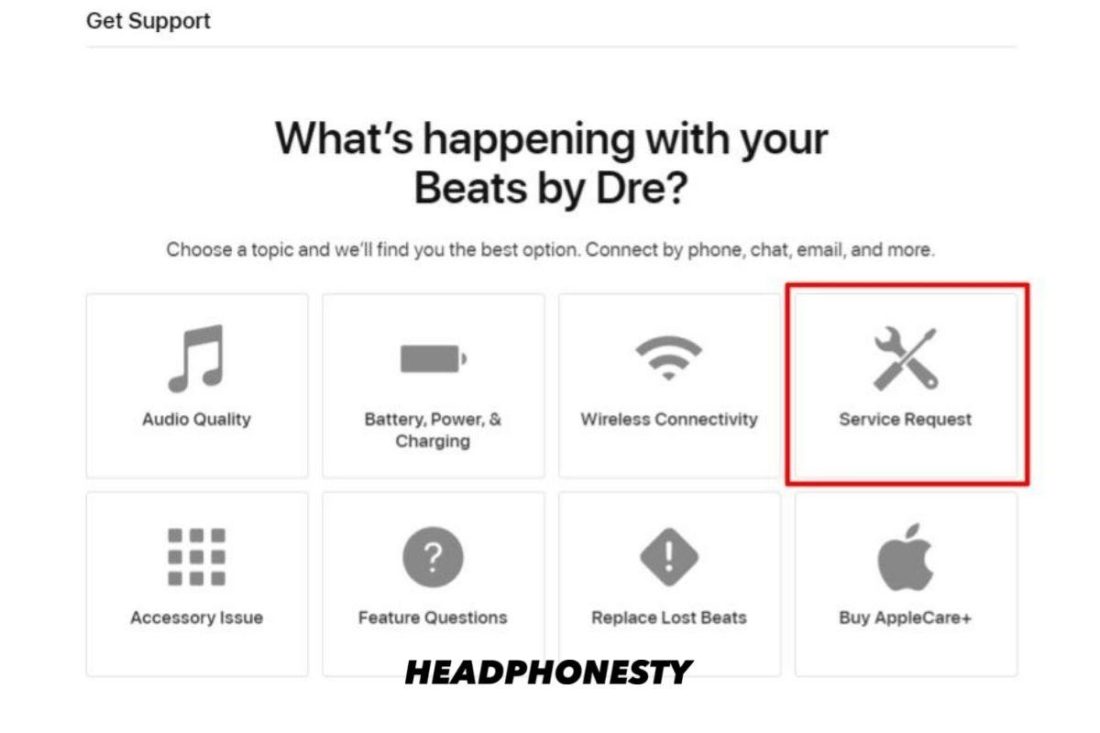
Select 'Service Request' from the carte du jour. - Choose 'Chat to Arrange a Repair' to suit your repair via chat box or 'Telephone call to Arrange a Repair' to make it line for a live call.
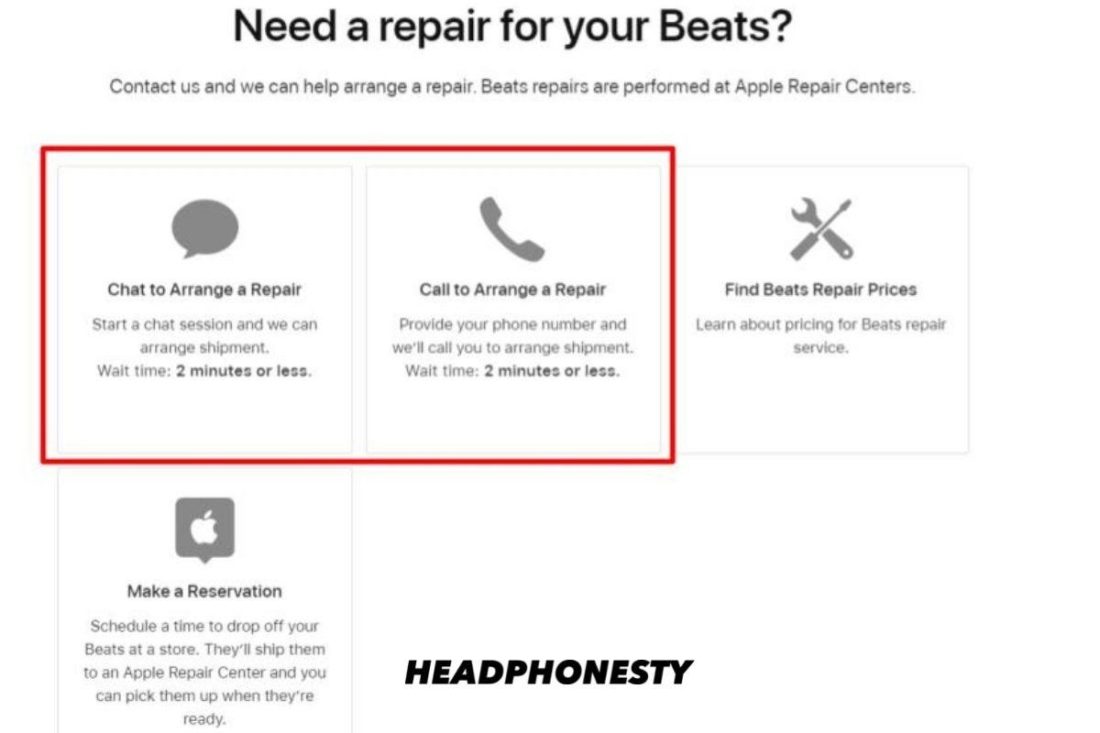
Choose either 'Conversation' or 'Call' to continue. - Fill out your proper name and e-mail address (plus phone number, if y'all opted for a call) to brainstorm support.
Additional costs and time needed
Of course, with convenience comes a price. And, for this, it involves your time and coin.. While the whole process tin be a bit circuitous, here's everything you lot need to know from the Beats repair website:
- Fourth dimension:
- Approximately 3-10 days after you send in your Beats.
- Local Apple tree authorized service providers may take different render times.
- Toll
- Will be confirmed with yous afterward your Beats are examined by the technician.
- The detailed repair pricing list tin also help you!
Decision
The concluding wire is soldered. Your feet are kicked up. The comfiest earpads to grace this Earth are resting on your ears.
Finally, yous become to enjoy the freshest hip-hop beats without spending a lot. Hopefully, this article helped you go to that point!
And then, what stock-still your Beats by Dre? Did you lot burn a finger while soldering? Ouch, we hope not! In whatsoever event, delight leave a comment below and tell us nigh your experiences.

How To Fix Broken Band On Beats,
Source: https://www.headphonesty.com/2021/11/how-to-repair-beats-headphones/
Posted by: schacherfrob1969.blogspot.com
0 Response to "How To Fix Broken Band On Beats"
Post a Comment